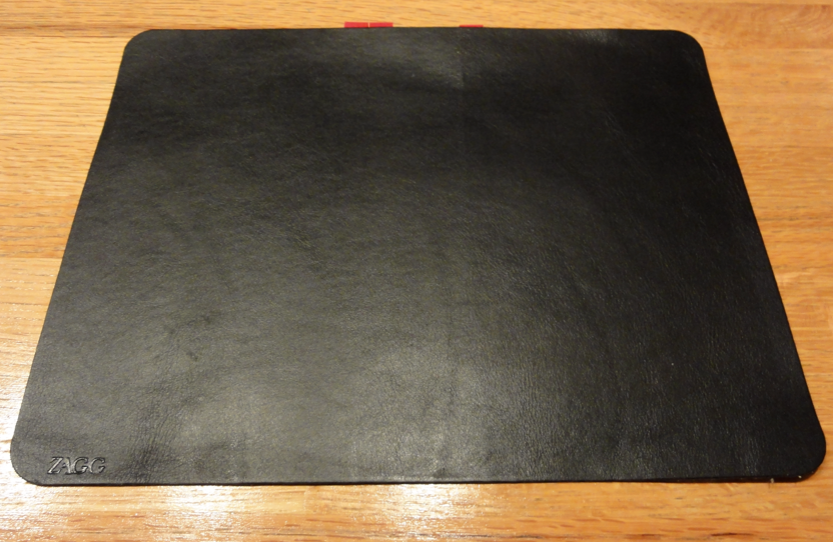
The other day Larry pointed out that, without my even thinking about it, I have a tendency to pull my iPad out of its case whenever I am using it in one place for an extended period. That makes it all the more important for me to make sure I have some permanent protection for the back of the device. Up until now that protection has come in the form of a Clear-Coat skin that I’ve had on the back, the screen, and the sides of the device since I first got it. It does a great job of protecting the iPad but, to be honest, it doesn’t add much in the way it looks. So I was a bit intrigued to learn that the ZAGG had released a new form of protection for the iPad and many other devices– their new LEATHERskins.
The ZAGG LEATHERskins are a thin layer of real leather for the back of the device that stays in place thanks to a special adhesive. The skins are expensive– $49.99 for the skin only and $79.98 for a combination of the skin and one of the company’s invisibleShields- so I was a little bit concerned about trying to fix it myself. Thankfully Larry was visiting the other day. I asked him to put it on for me since he is a pro with this sort of thing. (By “pro” I mean “compulsively anal to the extreme”.) 🙂
Let’s take a look…

From ZAGG-
Add distinction to the most popular handheld gadgets with ZAGG LEATHERskins – a soft, thin skin that applies like a film but provides the touch and feel that only comes with genuine leather.
Available in rich shades and various designs, ZAGG LEATHERskins bring sophistication to any device. Supple leather forms to curves while special adhesive keeps the skin firmly in place.
This LEATHERskin fits both the iPad (Wi-Fi Only) and the iPad (Wi-Fi + 3G).

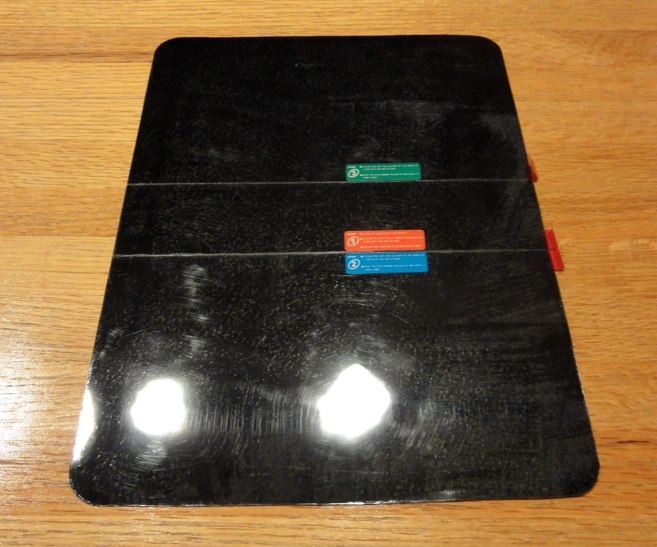
Because the skin is as large as it is, it covers the entire back of the device, placing it down could be a bit tricky. As a result, the company has developed a system whereby there are three different areas that are exposed one at a time so that you are only working with one section during each of the three steps.
Because I had a Clear-Coat on my device the first thing Larry had to do was to remove the skin. This actually took him a few minutes and a lot of muscle–it’s amazing how well it adheres to the device it is protecting! Because it had been covered the back was pristine and didn’t need any further cleaning. In most cases however, the first thing you need to do is make sure that the back surface is perfectly clean. This will not only ensure a secure grip but will also help prevent lumps and bubbles between the device and the skin.
Once the device was prepped Larry removed the middle strip to expose the adhesive in the middle of the skin. This is clearly indicated as the first step by the number one on a small tag connected to that area. He carefully placed the skin on the device and then pressed out any air bubbles that might have made their way in. The first time he did it the skin was lined up quite well but not perfectly so he simply lifted it up and tried again.

The second time was a charm so then he removed the section that was marked with the number two and placed it down. Because the skin was already fixed in place and the first step the second step took only a few seconds. He pressed out any air bubbles and then repeated the procedure with the third and final section. In all, it took them only about four or five minutes to get the skin in place, smooth it out and be good to go.

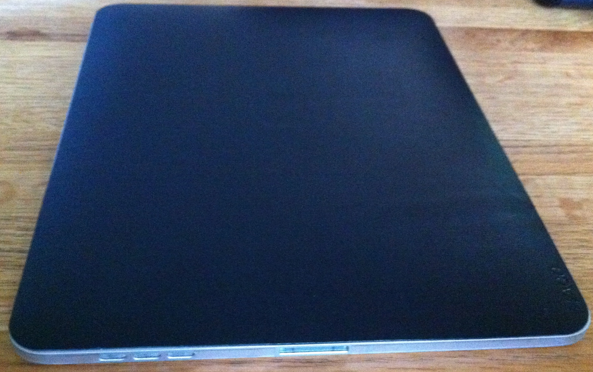
I immediately liked the way it looked and we both were quite taken by the fact that, while the Apple logo is protected, because it is a bit lower than the rest of the back the imprint of the Apple comes through. It’s a nice but subtle accent that’s accidental but a pleasant accident.
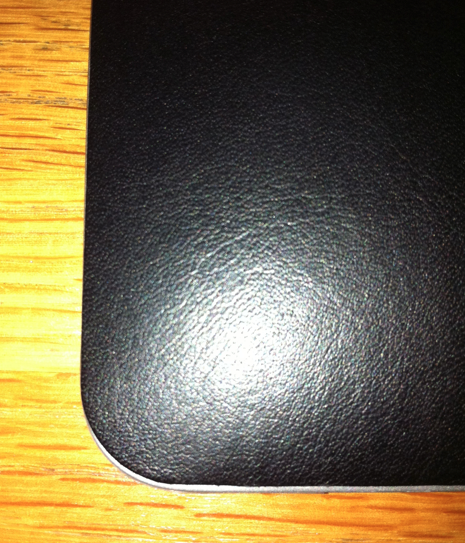
Because the LEATHERskin real leather the skin isn’t uniform. I like that because it gives more personality to it. And over time it should get even more personality! As I’ve use the device more and more with the skin in place I’ve appreciated both the added grip it provides and the slightly “cushier” feeling when grabbing onto it.
In all this is a terrific way to protect the back of the iPad… with two caveats.

First, the skin goes almost to the edge of the device but not quite to the edge. This means that the very edges, especially at the top and bottom, remain a little bit exposed. What troubles me about this is that these are the most vulnerable spots on the device. I do understand why this is the case since, if the skin went exactly to the edges, the possibility of having it in place without there being some overflow somewhere would be tremendous, but still it is a bit of a bummer.
Second, at $50 for the skin it’s not an inexpensive way to protect your device and you still will want a larger case for when you’re moving from place to place and you definitely are going to want to screen protection. This isn’t the type of protection that you’re going to want to put on and take off but rather it’s for somebody who wants to put it on their device and leave it there for an extended period.
Other than those two concerns, however, I really like the skin and will be leaving it on my iPad for the foreseeable future. I appreciate ZAGG sending a review sample and am looking forward to checking out the upcoming version for the iPhone 4!
The ZAGG LEATHERskin for Apple iPad is available directly from the ZAGG website.
MSRP: LEATHERskin/invisibleSHIELD Screen Coverage
$79.98; LEATHERskin Only $49.99
What I Like: Looks and feels great; Apple logo shows through a bit; real leather that should wear nicely with time
What Needs Improvement: Skin doesn’t go right up to the very edge of the back; Pricey for just back protection
