


The Lowdown
mowing is finally viable for me.
If your yard falls within its mapping limits and especially if you’ve struggled with RTK/GPS models, the Navimow i2 is an easy recommendation. It’s the first robot mower I’ve used that actually feels practical instead of experimental. The Navimow i2 lawn mower gets a thumbs up from me.
Overall
Pros
- Simple setup
- No RTK antenna
- Quiet
- Decent warranty for charging station and battery
- Keeps my rustic yard looking spiffy without me lifting a finger!
Cons
- No way to bypass the .5 acre mapping constraint
You know the saying, “the third time’s the charm”? That may finally be true for me and robot lawn mowers. My first review unit couldn’t handle the weak GPS signal caused by the many trees in my yard. A year or two later, I tried another brand, hoping the technology had improved, but it failed for the same reason. Fast-forward another year, and I’ve been testing the Navimow i2 LiDAR mower, which doesn’t rely on GPS. Will this be the robot mower that finally works in my yard? Read on to find out.
What Is It?
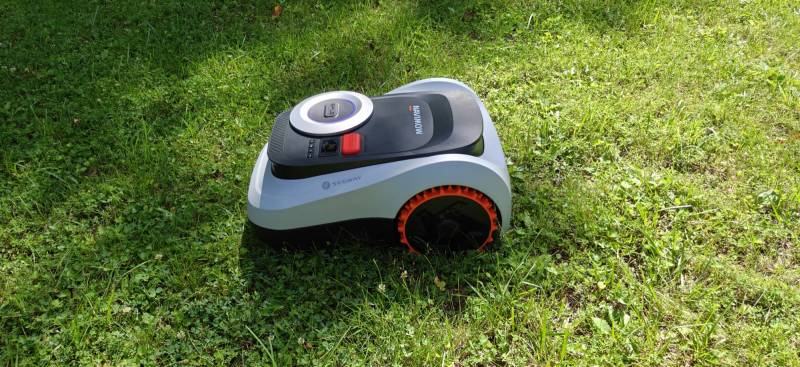
The Navimow i2 is an autonomous lawn mower that mows your yard for you, saving time and effort. The difference between many robot lawn mowers and the Navimow i2 is that the Navimow i2 does not use an RTK antenna receiver for GPS positioning (RTK stands for Real-Time Kinematic). As mentioned in the paragraph above, those types of mowers won’t work in my yard. The Navimow i2 uses a LiDAR system that is similar to the way a robot vacuum works inside your home. Instead of an antenna that triangulates the mower’s position via GPS, the Navimow i2 uses built-in cameras and LiDAR to mow within a boundary (don’t worry, it doesn’t require any wires to be installed).
What’s Included?
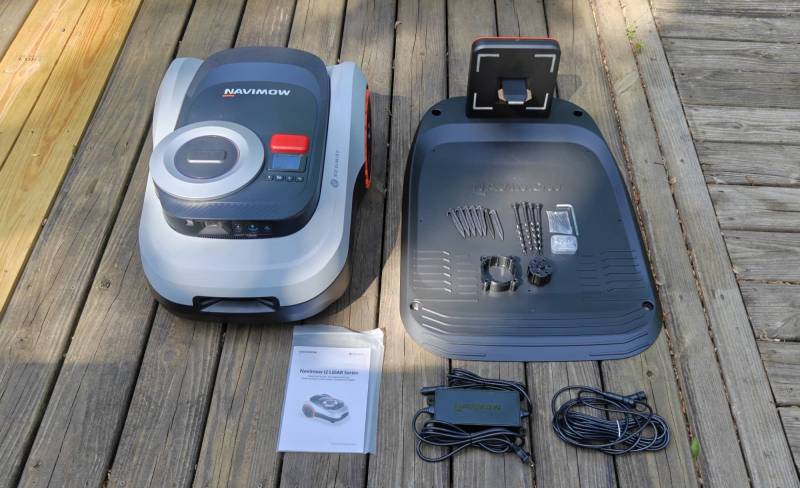
- Navimow i2 LiDAR mower (model 1215)
- Charging station
- Power supply
- Extension cable for the power supply
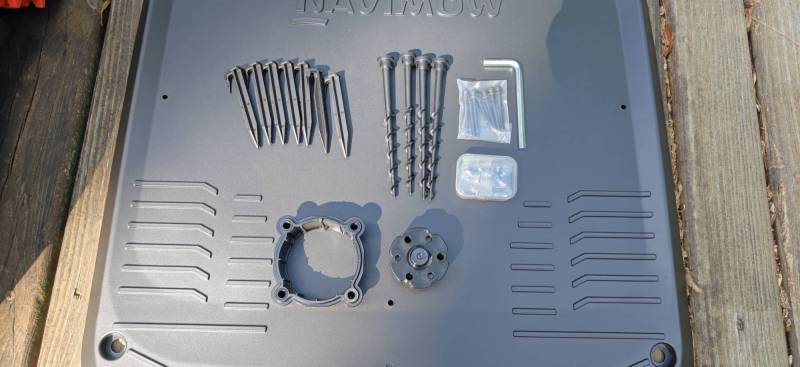
- 6x Spare blades with bolts
- 7x Pegs to secure the power cable
- Low-cutting kit
- Quick start guide
Tech Specs
- Recommended mowing area – 0.37 acres
- Time Required to mow area – 16 hours
- Location system – EFLS™ LiDAR (LiDAR + Vision)
- Object detection system – VisionFence™ (LiDAR + 140° RGB Camera)
- Noise level – 59 dB(A)
- Protection level – IP66
- Maximum slope – 45% (24°)
- Antenna required? No
- Auto-mapping? Yes
- Multi-zone management – 20 zones
- Cutting Height – 2–4 in (0.8–2.8 in with included low-cutting kit)
- Cutting Width – 8.66 in
- Cutting disc – 1 disc, 6 blades
- Battery capacity – 7.65 Ah
- Charging time – 13 minutes
- Mowing area per charge – 0.105 acre
- Mowing area per hour – 0.0395 acre
- Dimensions – 25.0 × 17.5 × 11.3 in
- Weight – 32.4 lbs
Design and Features
In case you weren’t aware, Navimow is a subsidiary of Segway, the same company that makes two-wheeled self-balancing vehicles, traditional scooters, and e-bikes. So you know they know how to make a wheeled device. But the question is, how does that expertise translate to robotic lawn mowers?
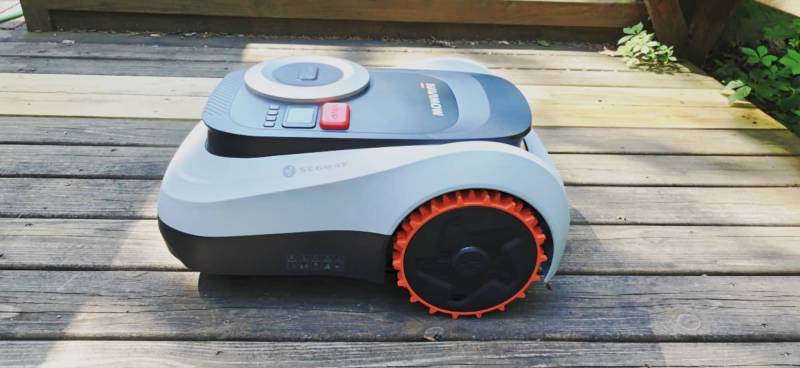
The i2 is a small-ish mower that has chunky, grippy off-road-style wheels on the back that are designed to allow it to keep traction on up to a 45% slope.
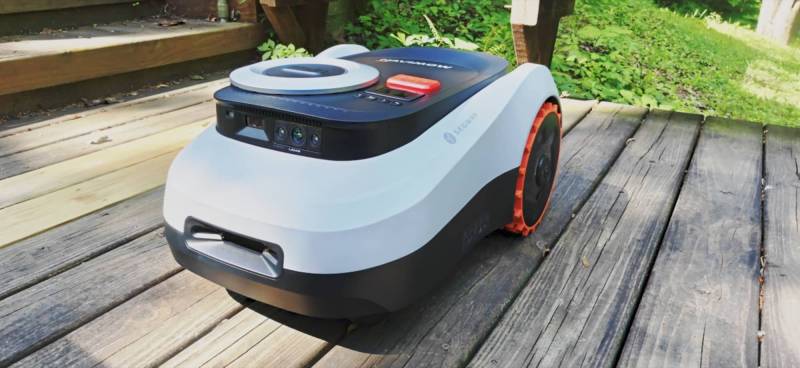
The shell of the i2 is made of plastic, but it’s rugged enough to survive being placed outdoors in full sunlight. It can also withstand a downpour with no issues at all. If you’re worried about the sun and rain, you can buy an optional garage for the mower. It’s basically a plastic roof that attaches to the charging station base (I think). Navimow is supposed to send me the garage, but I’ve yet to receive it. If/when I do, I’ll be sure to update this review to show how it is installed and let you know if I think it’s worth buying.
The front of the Navimow i2 LiDAR lawn mower has the charging port (more on that later) and cameras that let it map your yard, detect boundaries, and avoid obstacles.
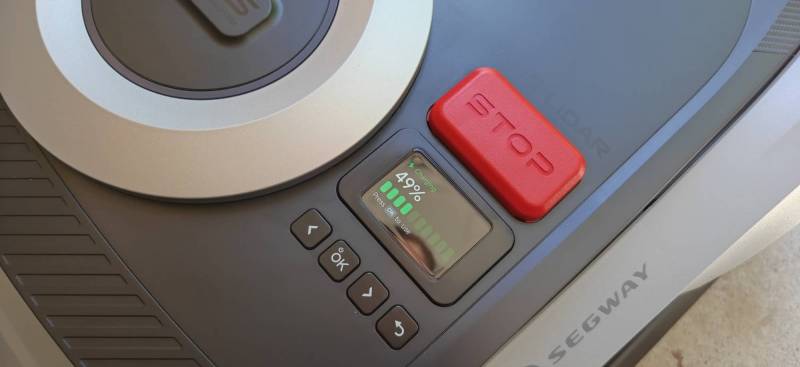
The top surface of the Navimow i2 LiDAR Robotic Lawn Mower has a large and clearly visible stop button that you can press to immediately halt the unit from mowing and moving if there’s a situation when that might be needed. Below the stop button is a color display that provides status for charging and a menu of settings. A row of buttons below the display allows you to navigate the onboard menu.
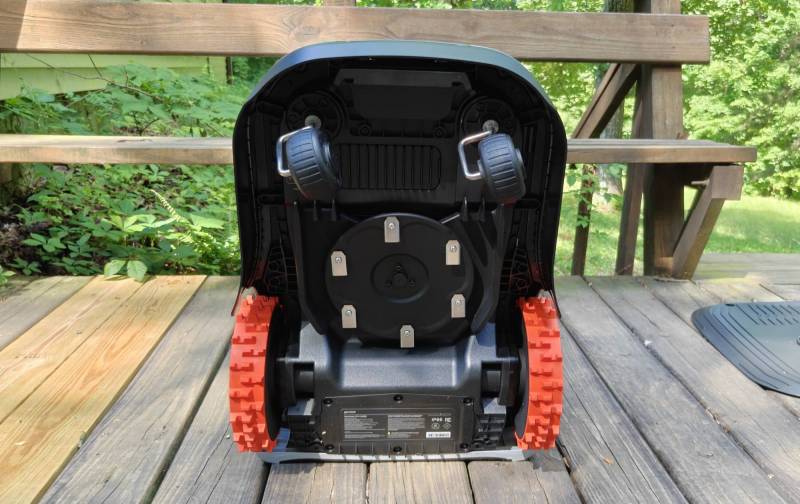
A look at the Navimow i2’s undercarriage reveals two smaller swivel wheels up front and an 8.6-in-diameter cutting disc.
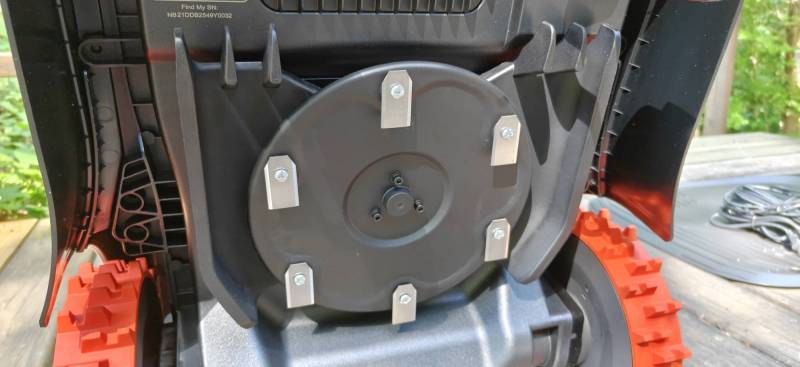
The cutting disc has 6 razor-sharp blades attached. These blades are sharp (very sharp) on both edges and swing/swivel freely as the cutting disc spins.
Kudos to Navimow for including a full set of replacement blades and bolts. It’s a nice touch to include the bolts with the blades just in case you lose one or two in the grass. Navimow also includes an adapter that you can install above the cutting disc to lower it if you like your yard cut really short. Without the adapter, the cutting height can be adjusted from 2 – 4 inches. With the adapter, you can achieve a new range of 0.8-2.8 inches.
Installation
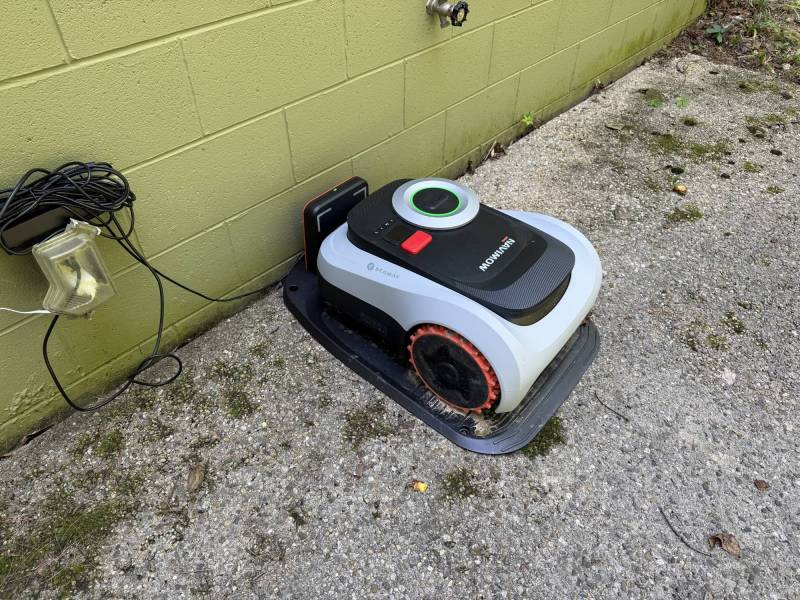
Setting up and installing the Navimow i2 LiDAR is incredibly simple since you don’t have to worry about an RTK antenna. All you need to do is take everything out of the box and figure out where you want to place the charging station. Note that you will need an outlet. I ended up placing the station on the concrete patio at the back of my house as it’s the only area I have with an outdoor power outlet. Yes, I know my patio needs to be power washed. Don’t judge me 😉
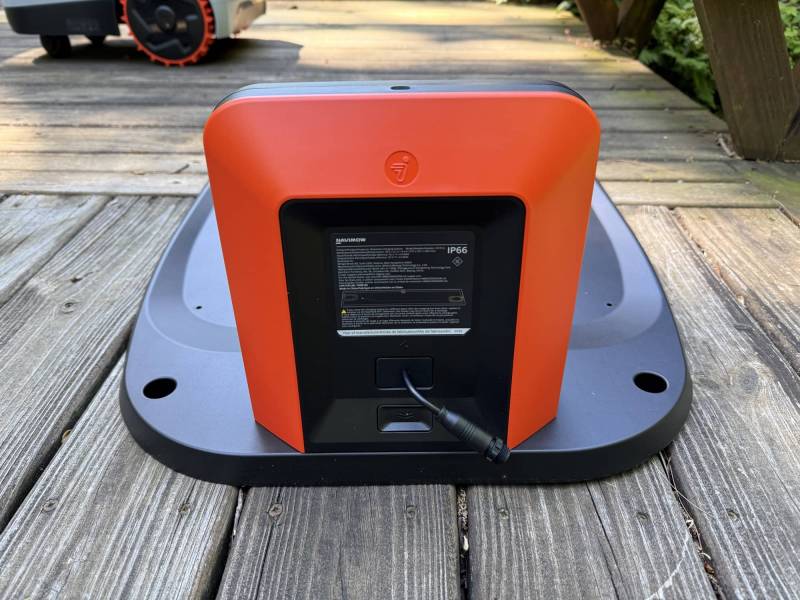
The charging station doesn’t have to be placed on a concrete surface; it can be placed in your yard. Holes in the base let you use the included plastic screw pegs to secure it firmly to the ground. Then you just screw in the weather-protected power cable and plug it into power.
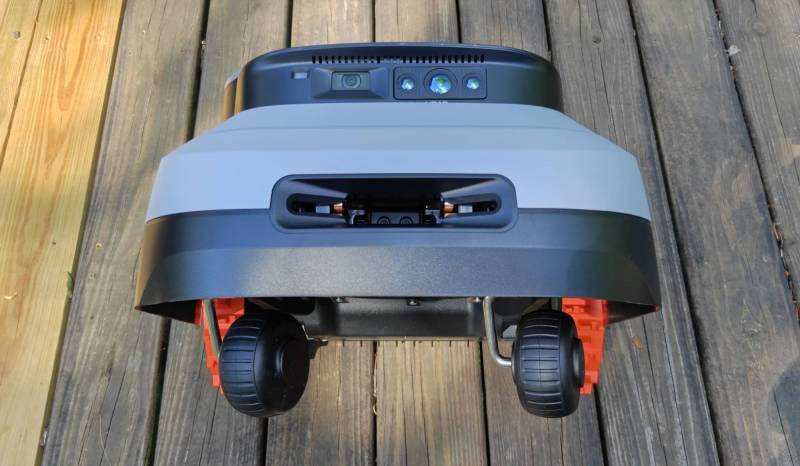
The front of the Navimow i2 LiDAR Robotic Lawn Mower has a charger slot.
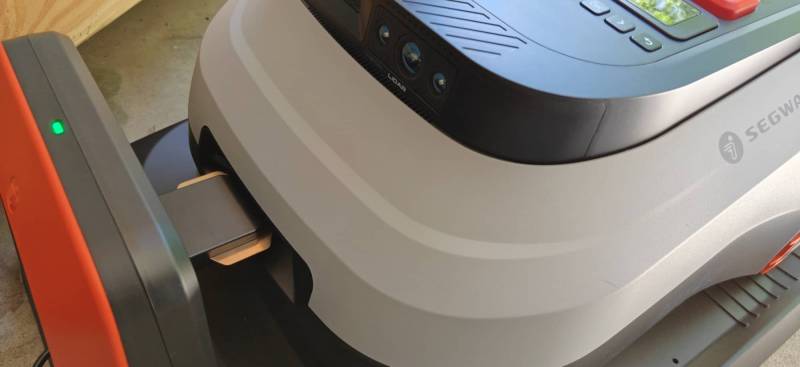
The charger slides into the slot when the mower returns “home” to top up the battery.
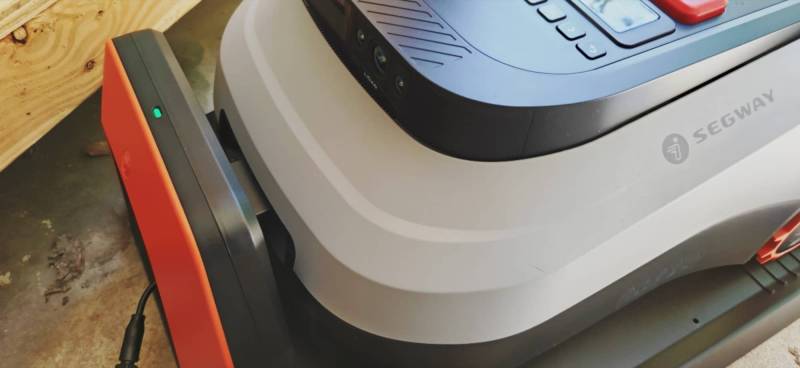
Charging starts immediately. Using the app or the mower’s buttons to send it home is much easier than manually picking up the mower and plugging it into the charger. Even when I fully inserted the charger into the slot in the mower, it would not show that it was charging. I only had this issue a couple of times during my initial setup. Now that the charging station is in its permanent location, the mower knows how to get home and plug in… which it will do multiple times while mowing your yard, depending on the yard’s size.
Let’s Get Mowing!
Once the charging station is set up and the mower is fully charged, it’s time to install the Navimow app and create your first map/zone. The app will also install any firmware updates that may be available for the mower.
I already mentioned that you don’t need to install an antenna, but you will need to create a map of your yard so the mower will know where to mow. This isn’t a difficult task, but may take a little time depending on the size of your yard. Using the app’s onscreen buttons, you drive the mower around the perimeter of the yard. It’s exactly like using an onscreen gaming controller. There’s a button to turn the mower left/right and one to roll it forward.
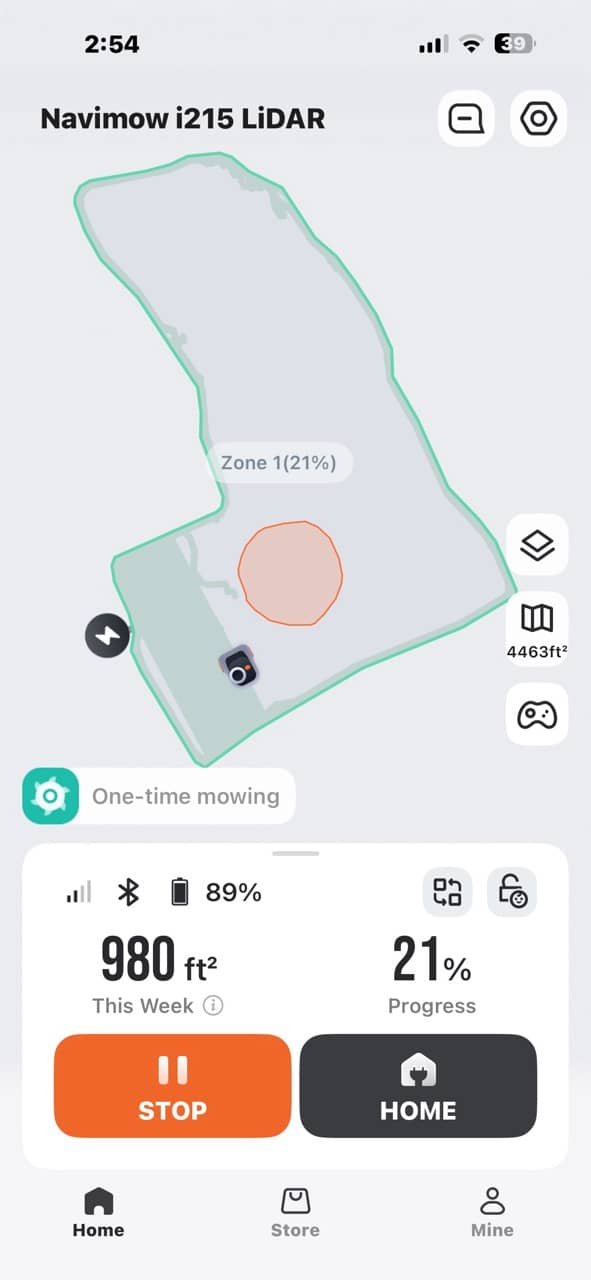
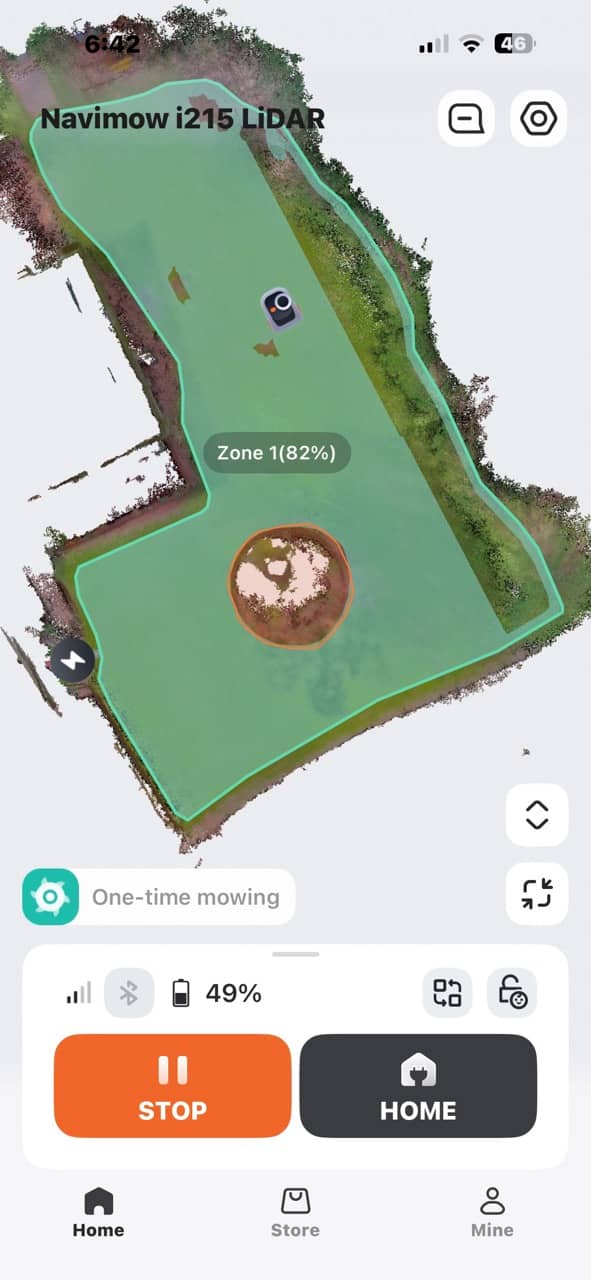
To get started, I made a map of my front and side yard. It created a zone for this map. Later, I made a second zone of another section of my yard, and then I made a 3rd zone for another area of grass that is across the road from my house. I have 12 acres of property that is split across a gravel road that is basically a long driveway.
You can view the map as a simple line drawing or as a more realistic satellite-style image. See the two map styles in the screenshots above.
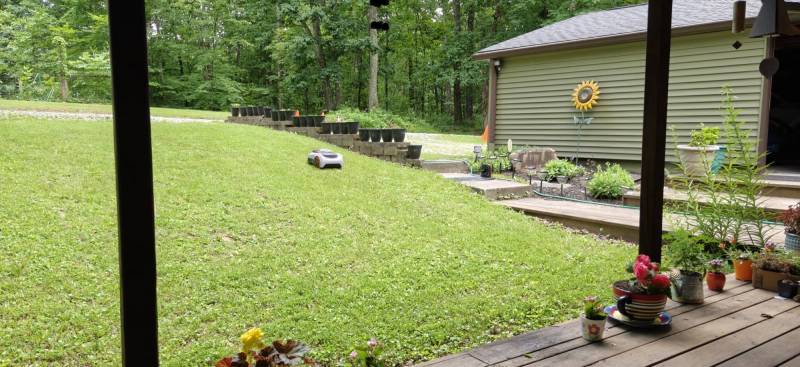
My front and side yards are L-shaped, as you can see in the map images. You’ll also notice that the yard has a slight incline to the road. The Navimow i2 had no issues with this incline. My yard is what I would call “rustic”. I have very tall mature trees/woods along all the edges of my yard and a very large tree in the center of my front yard. All these trees mean lots of limbs and sticks that fall during storms. I had to make sure that the yard was cleaned up before the Navimow’s maiden voyage. The yard also has roots that stick up, and some rocks.
I had fun sitting on my front porch swing watching the Navimow i2 first mow the outer boundary and then travel back and forth across the yard in narrow rows. The Navimow is so quiet that I wasn’t even sure it was actually mowing the first time I tested it!
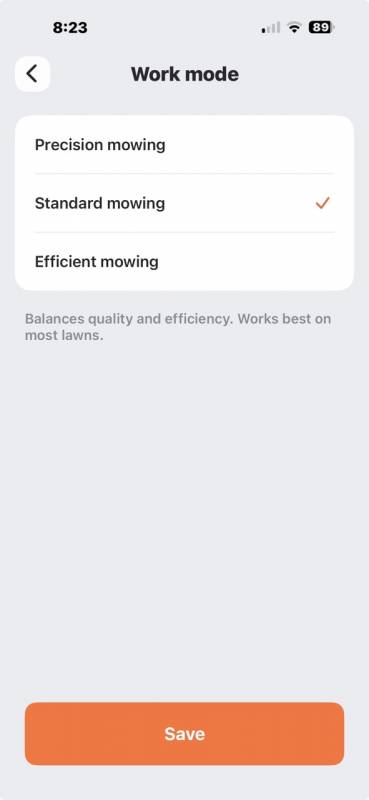
It’s important to understand that even with the mowing style set to the fastest mode in the app, that the Navimow will take longer (a lot longer) to mow a yard compared to using a push mower or a riding lawn mower. According to the Navimow app, the front+side yard zone that I mapped is 5315ft².
This section of the yard typically takes me about 30-40 minutes to push-mow and probably 20 minutes to mow with my Cub Cadet riding mower. It took the Navimow i2 a couple of hours. But did that bother me? Nope, not at all because I was inside the house relaxing in the air conditioning instead of sweating in the 90ºF temps, swatting gnats, and mosquitoes!
The first mowing test was a huge success. Finally, a robot mower that worked in my yard. Yay!!! Was the mowing perfect? No. It does miss a few sprigs of grass here and there, and depending on how the zone is mapped, it might not get as close to the boundary edges as I might like. That means that I may need to clean things up with a weed eater later. Is this a deal breaker?
Adding More Zones and I Run Into My First Problem
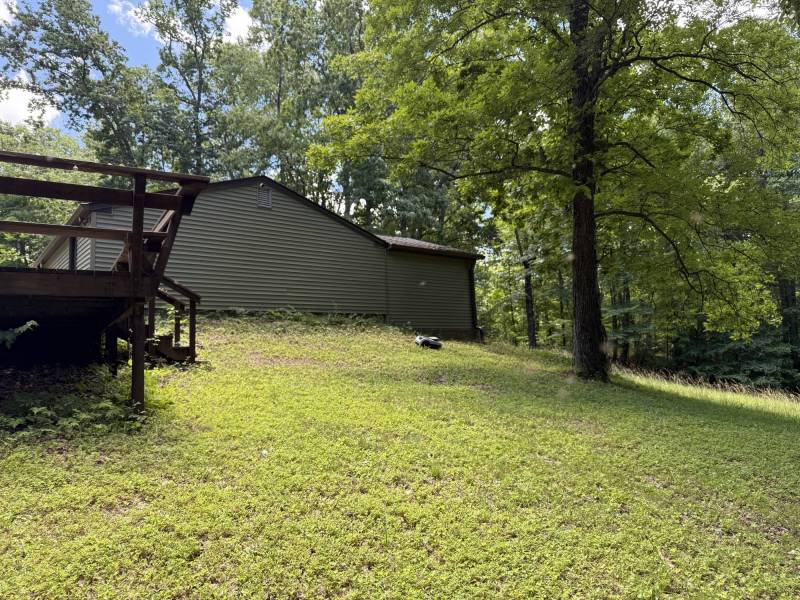
The next day I decided to map another section of my yard. A smaller side yard with more trees: shag bark hickory trees that drop bark and nuts, and pine trees that drop lots of pine needles.
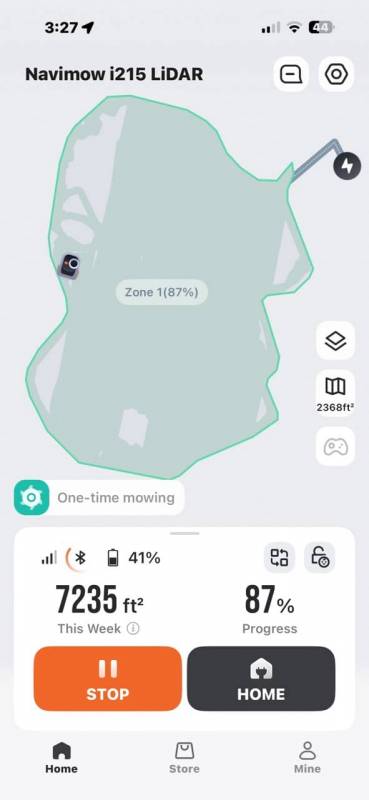
It did a pretty good job mowing in this zone, but it had a couple of problems. The first was that it got hung up in the pine straw under some pine trees. Pine straw is when the ground is covered with a layer of dry pine needles.
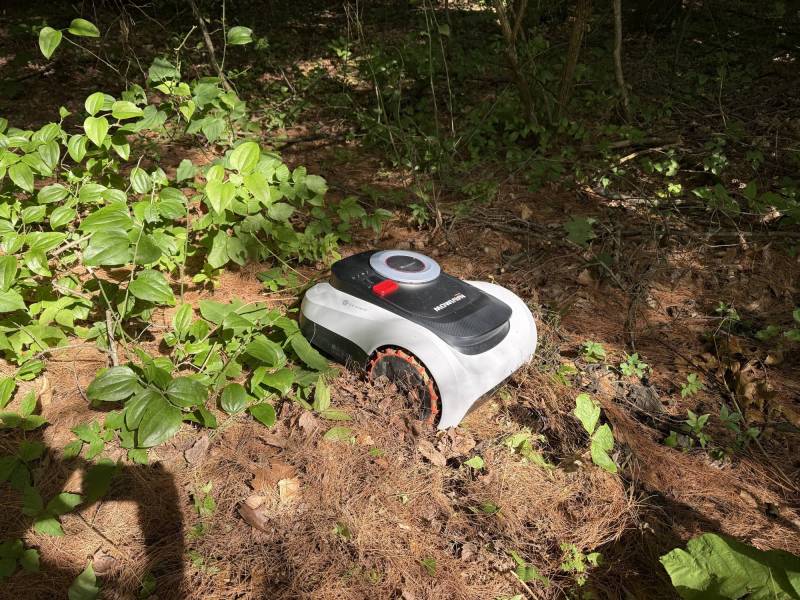
Even though the needles were dry and not deep, the Navimow kept spinning its wheels and couldn’t get traction. Since grass won’t even grow in the needles, I ended up editing out that part of the yard in the map just to avoid it with future mowing.
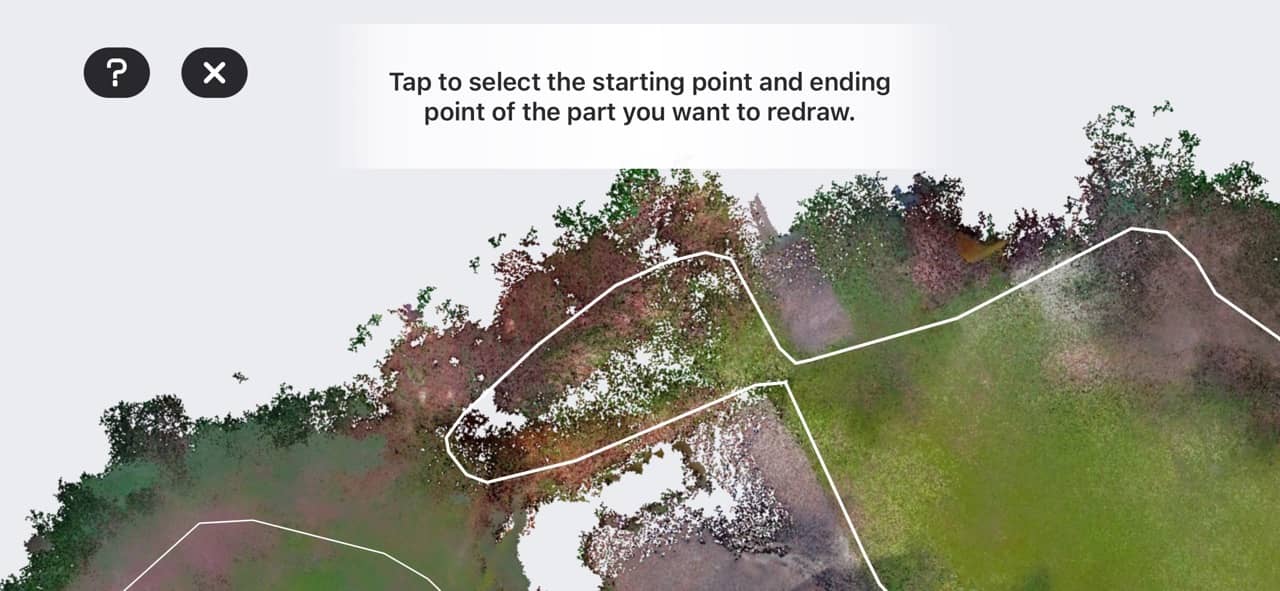
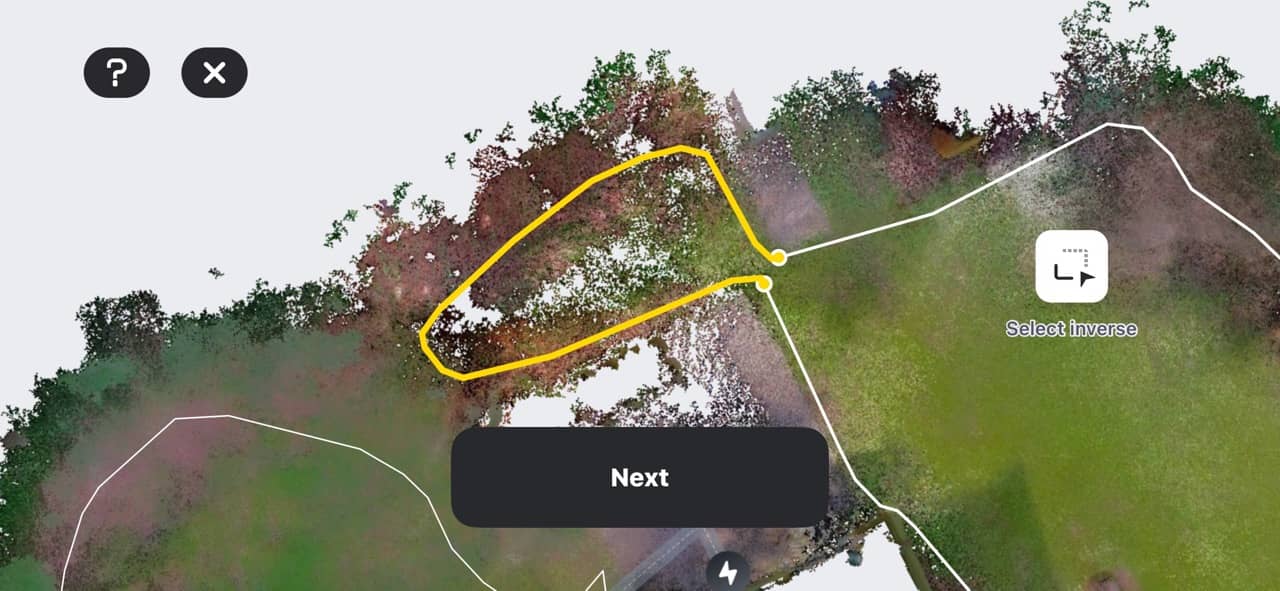
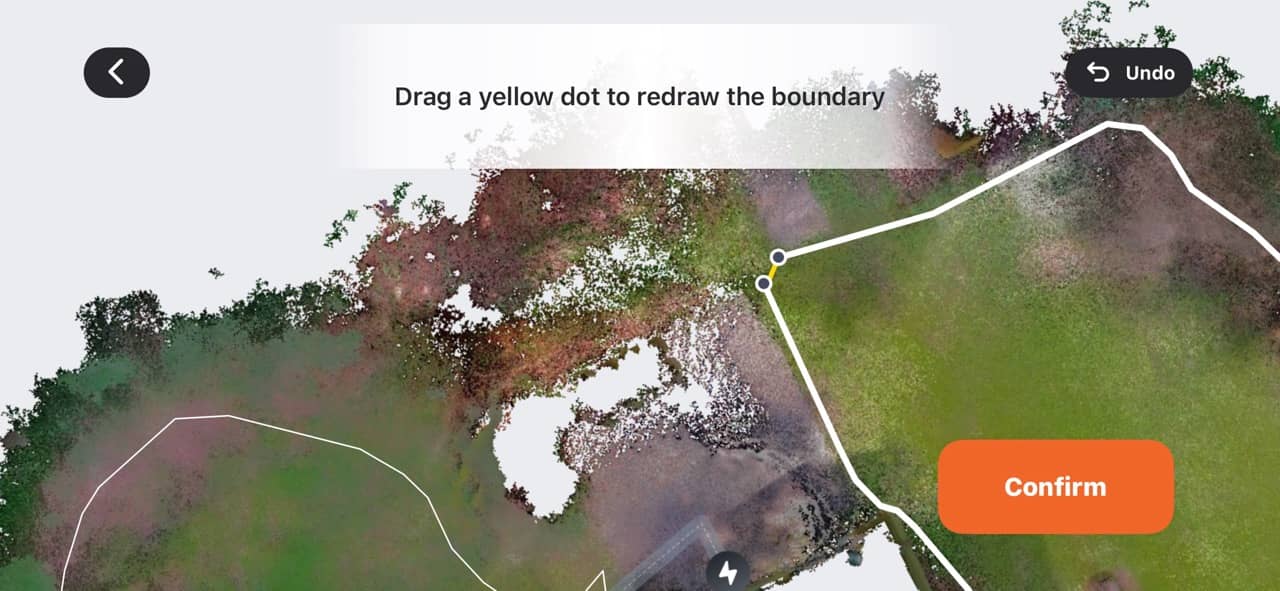
Editing the map is relatively easy in the app, either with your finger or by manually remapping a section with the mower.
The other problem I ran into was that Navimow i2 decided to go off-roading. For some reason, it went beyond the boundary by 15-20 feet. I found it down in my field, where that grass is waist-high. Since I was indoors and not fully paying attention at the time, the mower decided it was lost and just sat still, and after 15 minutes, it powered off automatically.
I had to go outside, find it, and carry it back to the charging station because the battery was low. The cool thing is that it recharged and automatically went back out and finished the job. This time it didn’t wander outside the zone.
While I’ve been testing the Navimow i2 LiDAR Robotic Lawn Mower over the past few weeks, it’s gone out of bounds once. I have a hunch that it might be due to heavy shadows in my yard on very bright days. Some areas of the yard are bright with sunlight, and others are dark from the shade of the trees. I think that might confuse the mower.
But as I said, it’s only happened 2 times so far, so I’m not overly concerned. The only annoyance is that once it’s outside the zone’s map bounds, you can’t just tap the home button in the app and expect it to return to the charging station. Instead, you will have to go to the mower, and either use the app’s on-screen controller to drive it back to a zone, or physically pick it up and move it within a zone’s boundary before you can tell it to go home.
One Navimow Might Not Be Enough for Your Property
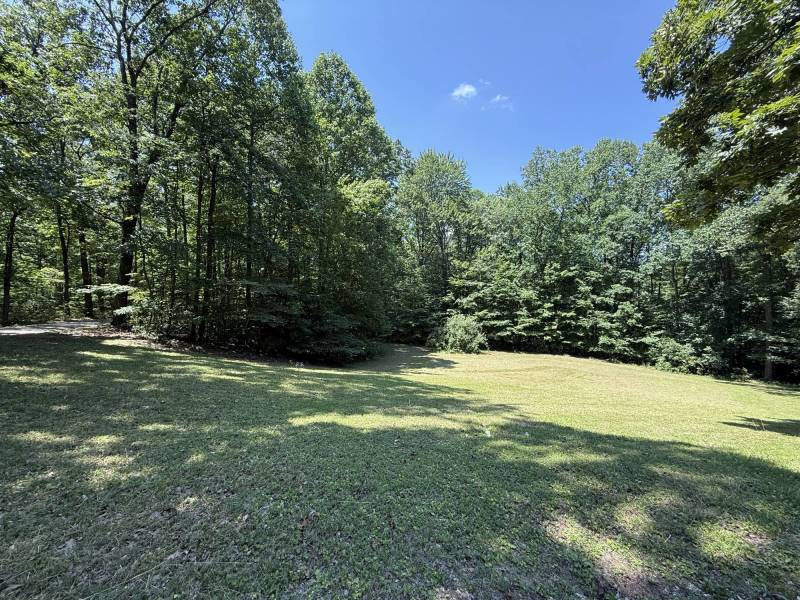
Remember when I said that I have 12 acres of property? While most of that acreage is wooded, I have about an acre of yards spread across different areas. I initially created 3 zones with channels connecting them and was happy with being able to mow all the areas that really show when people drive by (which isn’t all that often since I live on a dead-end road).
I was so happy with how well the Navimow was doing that I decided to map another zone of the largest “yard” on my property. We actually call it the meadow since that’s where the deer like to graze. We usually leave it unmowed, but I decided to mow it down so that the Navimow could handle it, and I mapped the zone.
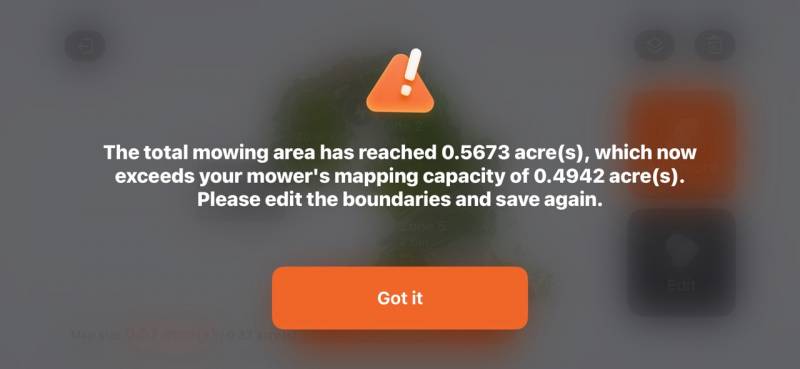
After mapping the new zone and pressing Done, I was surprised that the app told me that it couldn’t save the map because it was more than .49 acres, the mapping capacity of the mower. This is something I didn’t know was a thing with robot lawn mowers. I didn’t realize that they have a mapping capacity.
These constraints have to do with onboard memory, battery runtime, and efficiency. I find this an annoying limitation, since my way of creating separate zones and mowing them on different days never bumps up against that half-acre limit. In my case, I would need two Navimow mowers to mow all my grass.
See It In Action

After Using the Navimow i2 for One Month
Simply put, I love this thing! While it’s not perfect, my yard isn’t perfect in the first place, and now my yard looks a LOT better because it’s always neatly cut. And the best part… I didn’t have to lift a finger other than to press a button on my phone. This is the kind of smart home device that I love.
Final Thoughts
After striking out twice with robot mowers that simply couldn’t handle my tree-filled yard, the Navimow i2 finally delivered the experience I’d hoped for. The LiDAR-based navigation makes all the difference, allowing it to work reliably where GPS-dependent models failed me. It’s not perfect. I did run into a couple of out-of-bounds moments, and the mapping size limitation is frustrating. But those issues were relatively minor compared to the overall convenience it provides.
What really sold me is how hands-off it feels once everything is set up. It quietly does its thing, keeps the yard consistently trimmed, and saves me from spending hot, buggy afternoons pushing or riding a mower. For my “rustic” property with uneven terrain, trees, and debris, it performed better than I expected and proved that robot mowing is finally viable for me.
If your yard falls within its mapping limits and especially if you’ve struggled with RTK/GPS models, the Navimow i2 is an easy recommendation. It’s the first robot mower I’ve used that actually feels practical instead of experimental. The Navimow i2 lawn mower gets a thumbs up from me.
The Navimow i2 LiDAR Robotic Lawn Mower retails for $1,599 (currently on sale for $1,399); it is available directly from the manufacturer and other retailers, including Amazon.
Source: Manufacturer-supplied review sample.
What I Like: Simple setup; No RTK antenna; Quiet; Decent warranty for charging station and battery; Keeps my rustic yard looking spiffy without me lifting a finger!
What Needs Improvement: No way to bypass the .5 acre mapping constraint