There you are standing on the edge of a beautiful lake on a warm July day. With the naked eye the scenery is magnificent. Unfortunately while the upgraded camera on the iPhone 3GS works well, any given image only captures a small portion of the view.
Fear not! For there is a simple way to capture and share a beautiful panorama of the entire image in just moments. Here’s a quick “iPhone How-To”.
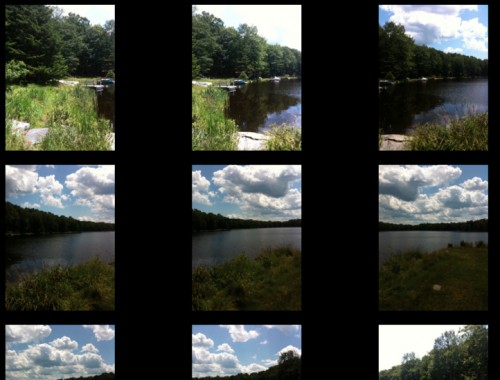
Step One — Take a series of pictures with the iPhone ensuring that each picture overlaps just a bit with the previous one. You can either go from left to right and stop or, you can go from left to right, drop the camera angle just slightly and then go from right to left so you get two full “sweeps” of the view.
Step Two — Start the application AutoStitch. ($1.99) Larry reviewed it a few weeks ago and it’s become one of my favorite applications.
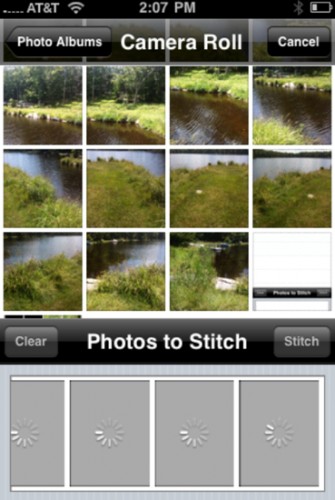
Step Three — While in the program select all of the photos you just took in the order you took them

Step Four — Tap “stitch” and wait while the application renders your new picture. Depending upon the number of images were trying to stitch together it will take anywhere from a few seconds to a few minutes.
Step Five –– Save the new image to the camera roll.
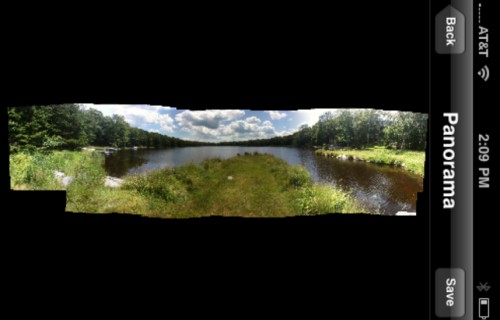
The new image will be nice enough but it will likely have jagged edges at the top, bottom and sides. Personally I don’t like the way this looks since it detracts from the overall “polish” of the image. That’s where the second application we’ll be using comes into play.
Start the application PhotoGene ($2.99).

Step Six — Click “edit new photo” and select the new panorama you just created.
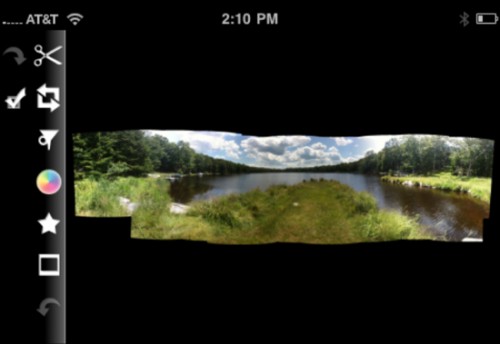
Step Seven — Tap the scissors icon. This will bring up a resizable square.
Step Eight — Move each corner of the resizable square so you get the maximum coverage of the image while not including any of the ragged edges at the top, bottom or sides.
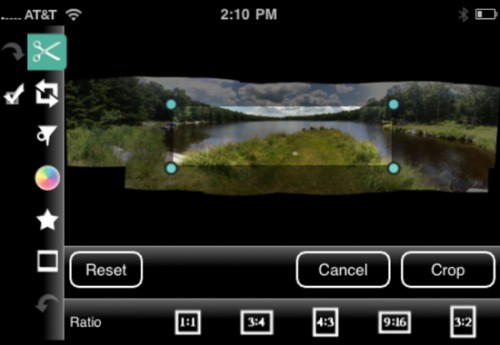
Step Nine –– When you’re happy with the coverage you just achieved “Crop”
Step Ten –– If you’ve done a good job of including as much of the panorama as possible while excluding any of the ragged edges tap the check mark and save a new picture to your photo.
From here you can handle the picture just the way you would any other picture.
![]()
For the greatest amount of flexibility, however, you may want to get the application ShoZu ($4.99). It allows you to upload pictures to a remarkably wide range of photo services including, but not limited to, MySpace, Flickr, Facebook, twitter, blogger, LiveJournal, Picasso, smug mug, and many more.

In all, with these three simple applications you can go from individual pictures to a magnificent online panorama in mere seconds.
