Editors Note: This review appears both here on Gear Diary and on Clinton Fitch (Dot) Com!
As I have stated many times throughout my reviews here and at Clinton Fitch (Dot) Com!, I travel quite a bit for my “day job”. Just so everyone is clear: American Airlines Executive Platinum isn’t all it’s cracked up to be. It means that you have had a lot of time on airplanes. But I digress….
Understanding this, anytime I am able to find a tool that makes travel easier I’m automatically going to be interested. Once such tool has been Spb Traveler. Traveler was introduced in June 2007 and quickly became one of my must have applications while on the road. Traveler had everything I needed: Weather reports for multiple cities, a trip planner, currency converter, unit converter and a tip calculator just to name a few items. It was everything a traveler needed in one application.
Building on the success of Traveler 1.x, Spb has now released version 2 of the application and it is terrific. The all new user interface draws its inspiration from Spb’s other applications – Mobile Shell and Online – while providing you all of the tools that any traveler will need at some point or another. Add in a significantly improved flight planner, a 3D globe, and a flight search tool and you get the makings of a must have application for any serious traveler. The beauty of this application however is that even if you are the casual traveler, some of the tools that are built into the application you will find helpful. Regardless of how much you travel, every Windows Mobile owner should have a serious look at Spb Traveler 2.0.
Traveler requires you have a Windows Mobile device running Windows Mobile 5.0 or higher. It can be installed either in your device’s main memory or a storage card and will require approximately 8MB of storage space. Additional space will be necessary as city information and weather is downloaded so bear that in mind when you install Traveler. Many aspects of Traveler do require a data connection on your Windows Mobile device so keep this in mind as well as you use the application.
When you first open Traveler you will see the heavy influence of Spb Mobile Shell and Online in the user interface. Like Mobile Shell, there are buttons at the bottom of the display which allow you to change between the four modes of the application: Cities, My Trip Planner, Tools and the 3D Globe. As I mentioned in my review of Spb Online, the use of common interfaces has two effects which benefit you: Spb is able to re-use code which saves you on price increases and you don’t have to re-learn multiple interfaces. Once you learn one, you can easily navigate around the others. You will also note that like Mobile Shell and Online, Traveler is touch friendly. You can slide you finger up-and-down or side-to-side on your device’s screen to navigate around the application.
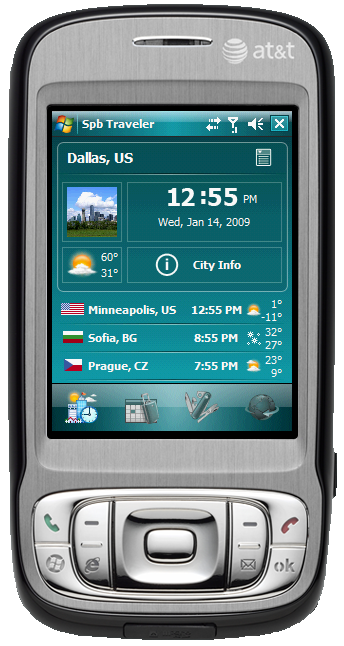
Figure 1: The Spb Traveler User Interface is strikingly similar to Mobile Shell
The first tab of Traveler is the Cities tab which allows you to add a nearly unlimited number of cities in which weather and information is only a tap away. To add a city, tap the menu icon in the upper right corner of the display. This will display a menu where you can add or remove a city, create a meeting in that city, view tip information that is customary for that location (GREAT for those who travel abroad) and a Google map of that location. You can also update pictures from that city which are provided by Spb over-the-air. The database that Traveler draws upon for the cities has over 10,000 entries so finding your city or one nearby should never be a problem. Once you have added the city, weather information, the local time and date are automatically updated.
Before I go into the layout of the Cities page, let’s turn back to the menu for a moment to go over some of the great features that I mentioned above. I’m going to skip discussing the Add City or Remove City functions because – well I would hope they are self explanatory! The next feature is Create Meeting. This feature allows you to create an appointment much like you would do in the native Calendar application. It allows you to put a subject, notes, start and end times and set a reminder. Once you create it, the appointment appears on you calendar just as it would if you were in the Calendar application itself. While it doesn’t offer anything new, what Traveler allows you to do through this feature is be productive. You do not have to switch from Traveler to Calendar saving you taps and time.

Figure 2: The Traveler Menu in Cities view
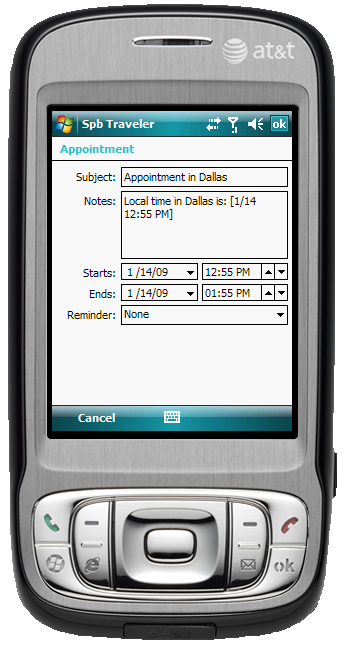
Figure 3: The Create Meeting screen is similar to that of Calendar
The Tip Calculator allows you to quickly and accurately determine a tip for a service provided to you while in that city. The calculator starts at the customary tip percentage for that city. So here in Dallas that is usually 15% although some services are more around 20% (Town Car services here in Dallas will assume a 18-20% tip). The Tip Calculator is the same that is available on the Tools menu and allows you to select tip levels for general services, restaurants or taxis. Once you put in the amount of the bill and select the tip percentage, the tip amount is displayed. You can also select to have the tip split amongst your party with up to 10 persons.
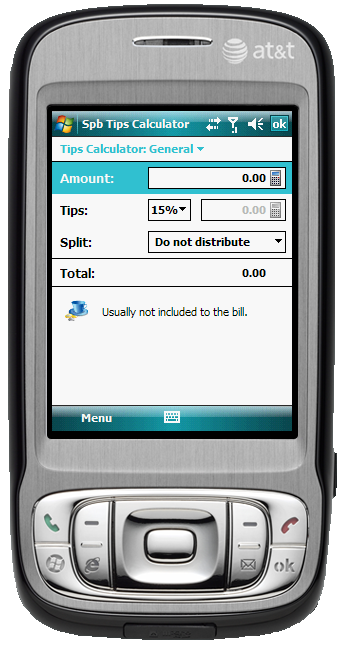
Figure 4: The Tip Calculator
The Google Maps feature is new to Spb Traveler and is just fantastic. When you tap this menu, Pocket Internet Explorer (or your default browser) is opened and you are taken to Mobile Google Maps with that city displayed. From there, you can get driving directions, zoom in or out of areas of the map and so forth.
The last item on the menu will actually bring us back to the Cities tab itself. The Update Pictures open allows you to download pictures from the city you have selected directly from Spb. These pictures, which come from Wikipedia, are of various locations within that City. The pictures themselves are displayed in the upper left corner of the City display next to the date and time in that city. The pictures will automatically shuffle if there are more than one image and if you tap the picture you will be brought to a simple slide show so you can view them in a larger format. If the city does not have any pictures available or you have not downloaded them, the flag of the nation that city is located will be displayed.
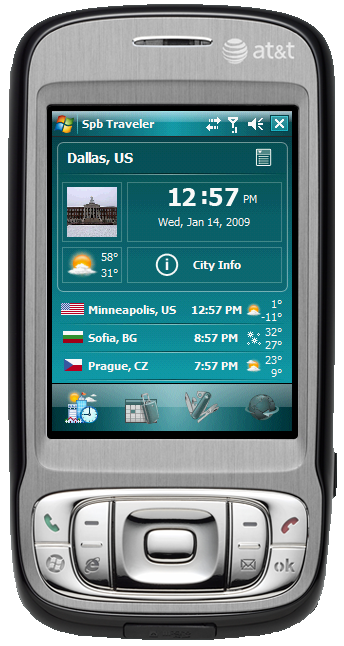
Figure 5: The City view in Spb Traveler
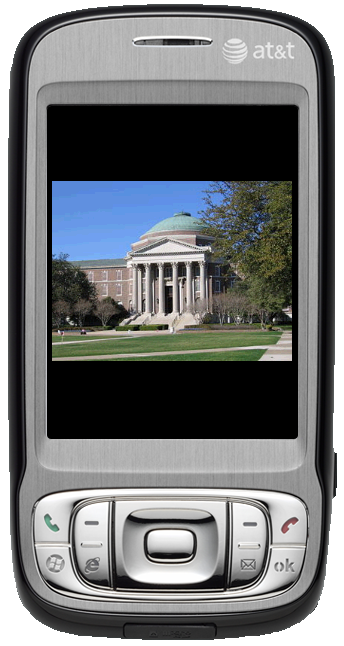
Figure 6: The Slideshow feature in Traveler
In the City view, if you have more than once city configured, they will be displayed at the bottom of the city screen. There it will have the national flag where that city is located, the city’s name, the local time in that city and the weather and temperatures for that particular day. Spb has made Traveler quite finger friendly so you can easily tap each city to view the details about it. Figure 6 should give you a good idea of the screen layout with multiple cities configured.
The main city that you have displayed will be at the top of the City display. As I pointed out earlier, the upper left will have the scrolling city pictures from that city while just below it will be the weather information for that city. Tapping it will open up the weather panel which displays the current day’s weather information along with a 5-day forecast. If you tap on a particular day, detailed information about expected weather conditions throughout the day are displayed. If you think you have seen this Weather panel before, chances are you have seen it! It is directly out of Spb Online and Spb Mobile Shell (although a bit more robust than that in Mobile Shell). Spb has done a great job with all of their new applications to give them a common look and feel. This not only keeps your learning time down to a minimum – learn one and you learn them all – but it helps Spb because they are able to re-use code. This ultimately can lead to keeping costs down for the company and for you.
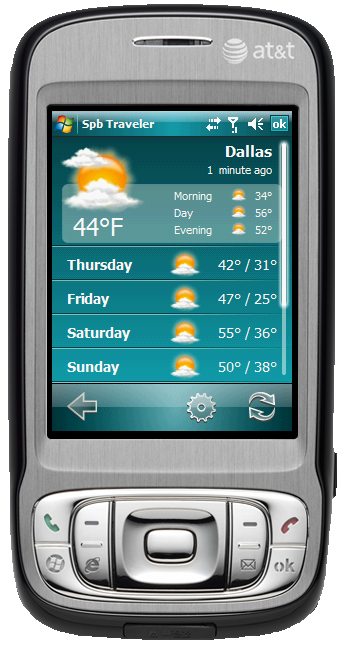
Figure 7: The Weather panel in Spb Traveler
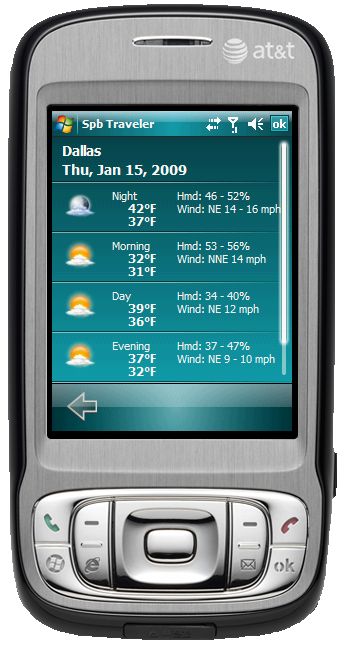
Figure 8: The detailed forecast in Traveler
While viewing a city, if you tap the date & time panel you will find another nice detail from Traveler. Here you will be able to see the time zone that the city is located in, the offset to GMT, the time of sunrise and sunset as well as a map where the city you are viewing is highlighted by a red dot. You will also note that there is an offset to local line as well. This tells you how far ahead or behind your home time you are in the city you are visiting.
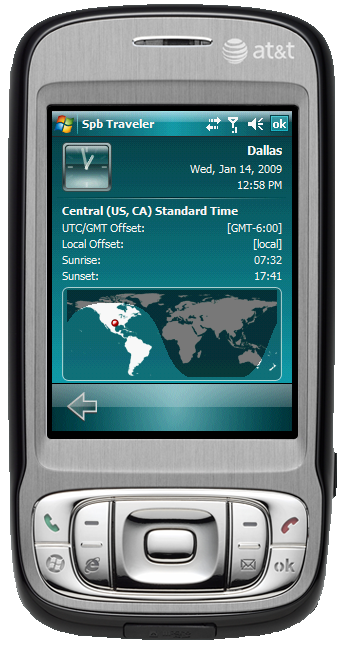
Figure 9: The date & time details panel in Traveler
The last facet of the City display I want to discuss is the City Info which is just below the Date & Time. When you tap this you will be taken to a page with a list of information and links about the selected city. I have found that this service in Traveler is not the most reliable, often timing out before it collect any information. However, when it does work it does provide a good bit of information to you.
Now that I have covered the Cities tab I’ll move to the Trip tab. The purpose of this tab in Traveler is to allow you to keep all of your flight, hotel, train, car rental or any other important travel information all in one place. The real beauty of the Traveler is that it synchronizes your trip information with your Calendar on your device, eliminating the dreaded “not sure where to look” issue. Like the other tabs in Traveler, the Trips tab is finger friendly and easy to use.
To add an item to the Trip tab, tap on the Add Item… on the screen. This will bring up a menu of all of the different items that you can add to your trip planner.
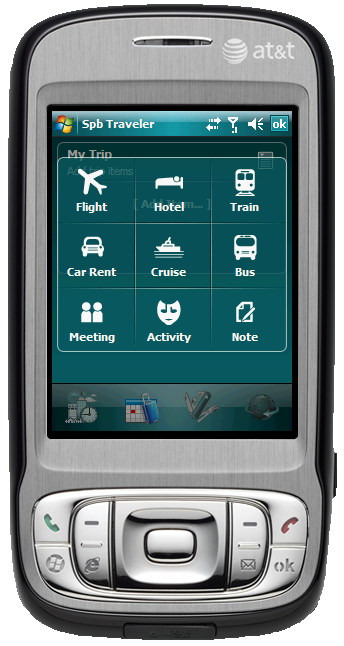
Figure 10: Trip tab items menu
I tap on the Flight icon and I’m brought to a entry form that looks similar to that of Calendar albeit with some custom fields. I enter in the information including the departure city and arrival city, flight number and so forth – I can even indicate the type of aircraft I will be flying in on the trip – and tap OK. An interesting tidbit is that Traveler has all of the three letter codes for the major airport throughout the world. So if you know that code, you can simply type that in and it will figure out the city you are departing from or arriving too. This saves a lot of time for me as most of my trips are to MSP and ORD (I’ll let you figure out those cities!).
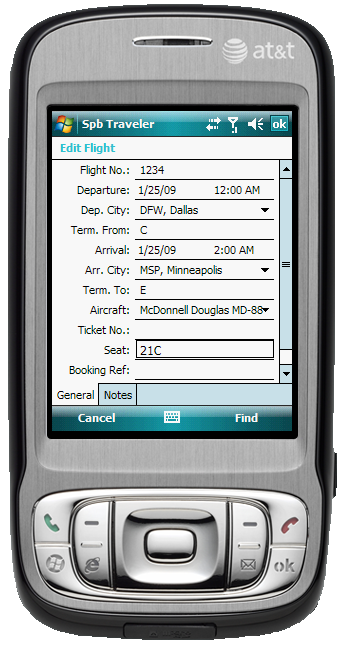
Figure 11: Entering in Flight information into Traveler
Once you have entered your flight information into Traveler it automatically populates that appointment into your Calendar. This eliminates the need to double-enter information and makes Traveler the one place that you have to go to enter your travel arrangements.
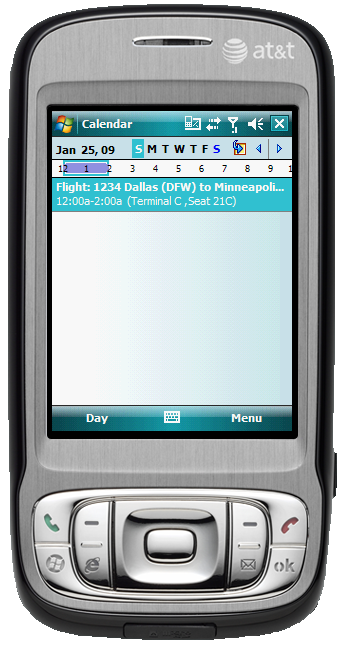
Figure 12: Flight entry into Calendar thanks to Spb Traveler
Once you have all of your trip information entered – flights, hotels, rental cars, etc. – you will see your entire trip displayed in Traveler. This again is a quick one-stop-shop to get your information, especially if you have multiple trips planned at once, which is often the case for me.
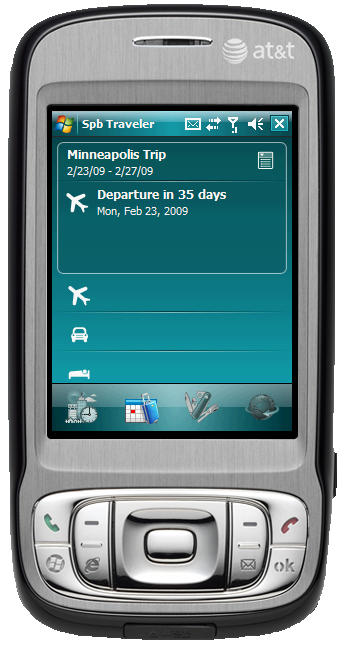
Figure 13: Entire itinerary scheduled in Spb Traveler
If you were to consider Spb Traveler simply on the merits of the City and Trip features you would do well to purchase it, especially for those of us who travel regularly. Like the previous version however, this application goes far beyond these rich features. The third menu option in Traveler brings you to a set of tools that allow you to do a variety of conversions and calculations that can not only be handy while you are traveling but while at home as well.
I have already covered the first tool, the Tip Calculator, above and in Figure 4. It works exceptionally well and is a quick way to determine how much tip you owe even if you are one of several in your dining party.
The second tool is the Units Converter. This tool allows you to take any unit of measure and convert it into another unit of measure. For example, if you need to convert miles to kilometers or inches into centimeters, you can do so quickly and easily. In all you can convert Length, Temperature, Area, Speed, Weight Volume and Pressure with this tool. Simply enter a number in the base unit and it will convert it to the other units displayed. You can also change up these output to other lesser used measurements (I’m still not sure I understand how weighing things in Stones works in the UK!).
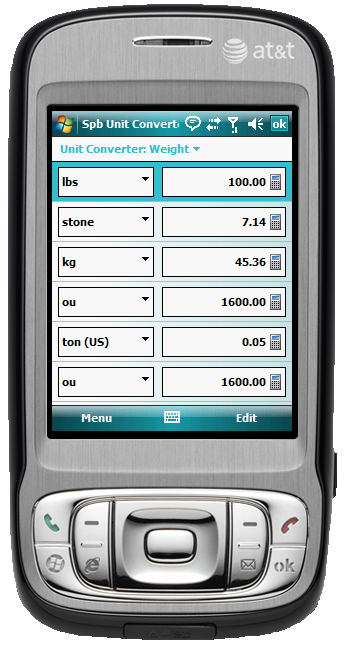
Figure 14: The Units Converter tool in Spb Traveler
The Flight finder application is another handy tool for those who travel regularly. Powered by OAG, this tool allows you to search for flights for any date between two cities. I use this often when flying to a city that I do not travel to regularly to give me an idea of how many flights are available to me on all of the carriers that service that city.
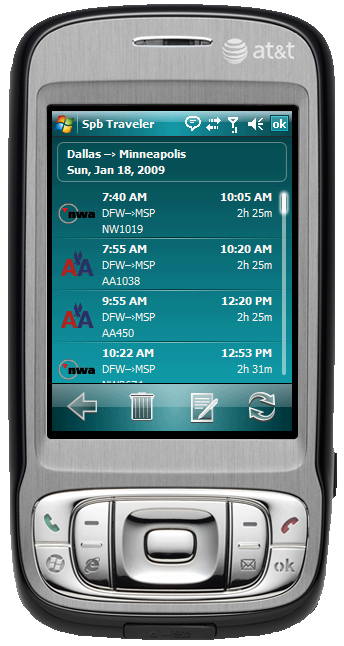
Figure 15: Search results from the Flight finger tool in Spb Traveler
The Clothing size converter tool is exceptionally handy for those who travel internationally. Now with only a few screen taps you can determine quickly and easily what the size 11 shoe in Australia is for you who lives in the United States!
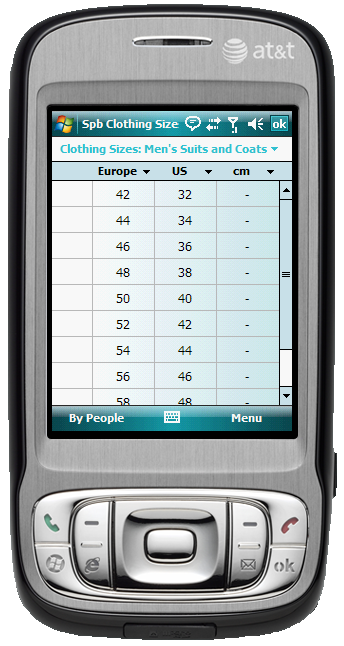
Figure 16: Easily figure out clothing sizes with the Clothing size converter tool
One of the bigger challenges with traveling internationally is determining just how much the local currency you can get for your US dollar. While this has been made somewhat easier in Europe thanks to the Euro, other parts of the world are a bit more tricky. Enter the Currency converter in Spb Traveler. This tool allows you to enter a dollar amount and convert it in up to five other currencies. You never have to worry about the conversion rates being out of data as Spb Traveler updates them automatically and you have hundreds of currencies you can convert.
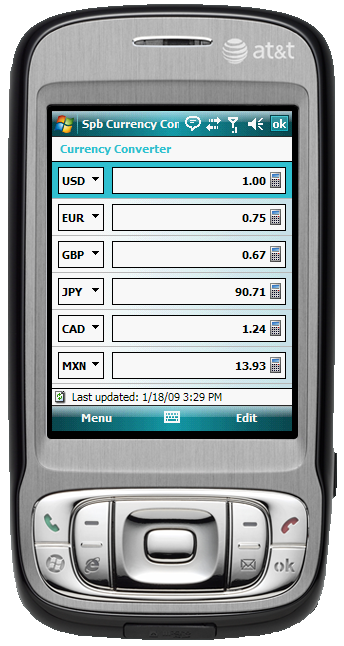
Figure 17: The Currency converter in Spb Traveler makes it easy to figure out exchange rates on-the-fly
Another important tool that is included in Spb Traveler for the international traveler is the Phrase Book. This applet gives you the translation of hundreds of commonly used phrases into another language. The phrase book is powered by LingvoSoft and included more than a dozen languages to translate into from another language. The phrases or words to translate are categorized to make it easier to find what you are looking for such as greetings, requests, saying goodbye and so forth. It is a powerful tool that could only be improved by added speech so you can hear the translation.
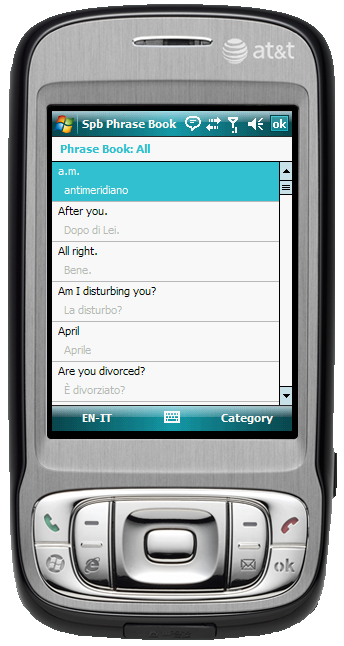
Figure 18: The Phrase Book allows you to translate hundreds of phrases into dozens of languages
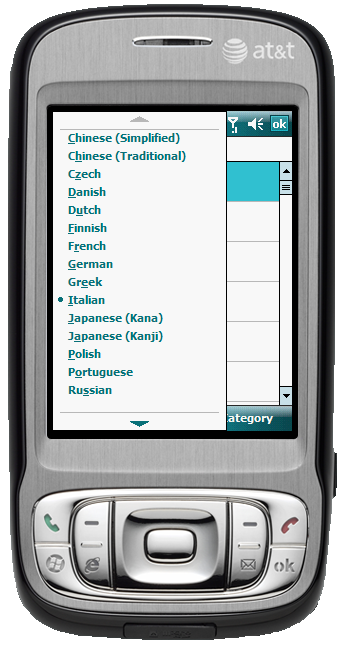
Figure 19: Selecting a language in the Phrase book is easy – just tap the softkey
The Time applet in Traveler allows you to quickly see the local time in all of the cities that you have entered into Traveler. This is particularly handy if you are trying to reach someone internationally so as not to call them to early or to late. Or worse, like I did, call your wife while you are in Europe when it is 4:00AM in Dallas!
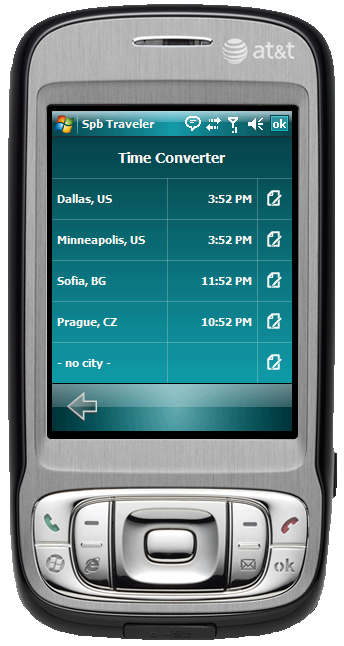
Figure 20: See all of the local times of your cities in one easy-to-read view
The last two features of Spb Traveler are really more for fun than practicality – although it can be argued there is a practical side to both. The Geo Game applet is a game which asks you a series of questions in one minute. The faster you get the answer the more points you will receive. This is a great way to test your knowledge of global capitals and national flags throughout the world. After you get an answer correct you are shown on the globe where that city is located.
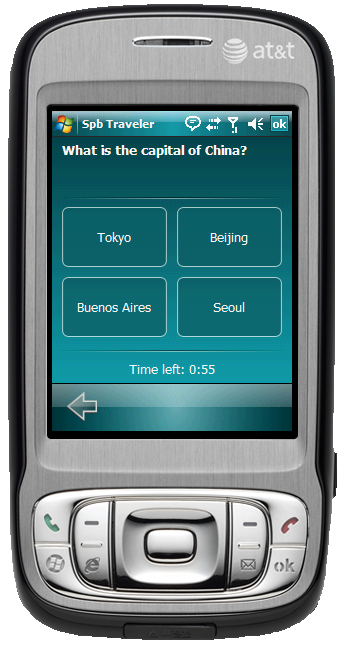
Figure 21: The Geo Game tests your knowledge of capitals and national flags throughout the world
The last feature is the Global display which is the last tab on the Traveler lower menu. This gives you an animated view of Earth with the cities that you have selected identified with their current time, date and weather. You can also configure it to show your upcoming trip that you have stored in the Trip planner.
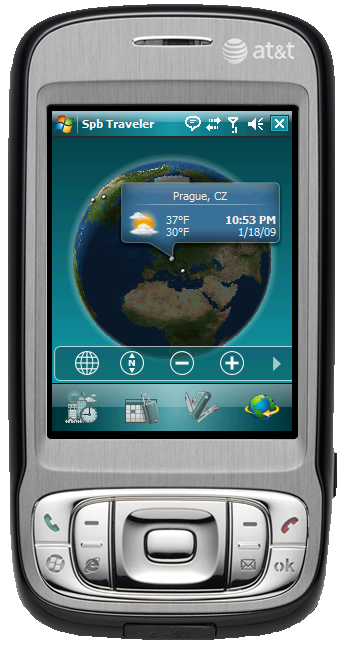
Figure 22: The global view provided in Spb Traveler
As you can see by the length of this review, Spb Traveler is a very rich and useful application. It is for everyone – the serious traveler to the casual traveler – and provides a Swiss Army Knife approach to travel information. If you need to know something while you are on the road, this is the application to have on your device.
Spb Traveler is $29.95 and is available for Windows Mobile devices running v5.0 and higher. Note that is designed for Windows Mobile Professional and Classic – the touch screen versions.
What I Like:
Rich set of tools
All-in-one application
Finger friendly buttons
What I Don’t Like:
Speech in the Phrase Book would be nice to see in future releases

I am loading this on the Touch HD right now; thanks for such a detailed review!
No problem Judie – it’s a great application and quite handy. Even if you don’t travel a lot the conversion tool and City information is worth it alone.