Ten years ago, I acquired two 55-gallon plastic drums to store an emergency supply of water for the impending Y2K disaster occurring at the stroke of midnight 2000. Of course, I became suspicious when the plane I was flying on did not fall out of the sky on 9/9/99 and my trusty Honda still ran like a charm well past January 1, 2000.
Being the positive person that I am, I was grateful to acquire several storage containers of personal hygiene items, first aid supplies and all kinds of camping paraphenia that I still use. So what if Y2K was the biggest con ever-perpetuated on mankind? I have all kinds of emergency supplies on hand, plus two 55-gallon plastic barrels!
As an avid vegetable and flower gardener, I’ve been hearing about the importance of using a system of collecting rainwater runoff from roofs. The benefits are having a mindset of being eco-friendly, lowering water bills by recycling rainwater, and having a ready source of water for garden use. There are a number of rainwater collectors available for sale using a large size capacity barrel and facets. After ten years of having these barrels, I decided to build one!
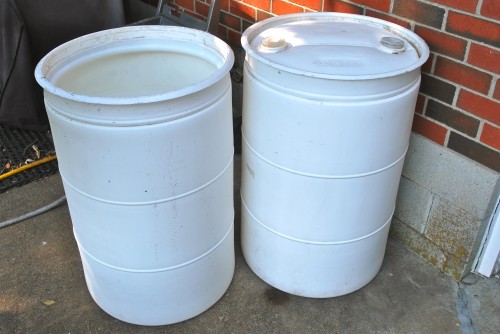
Containers can be easily found on Craigslist by searching for “rain barrels” or a local feed store for a going rate of $10 to $15. They are usually made of industrial plastic; some have a removable top or two screw-on caps. The two barrels I had contained soda syrup; they just needed rinsing out with a garden hose or pressure washer.
I spent a total of four hours planning, cleaning the barrels, running to the local hardware store for parts, clearing the shrubs and finally, assembling the rainwater collector. If you are a general handyman, they are easy to build with the right tools on hand. Most of the commercial ones I saw available ran about $100 to $200 each. I figure I could build one for around thirty dollars. Remember to check the water laws in your area!
I decided to work with the container that had no top, which made it easier to assemble parts from the inside out. With the version I built, you’ll need a drill, 1 ½” and 5/8” drill bits, silicone glue, a hammer, hacksaw, wire cutters and pliers.
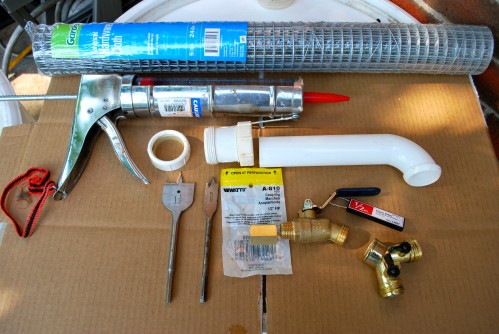
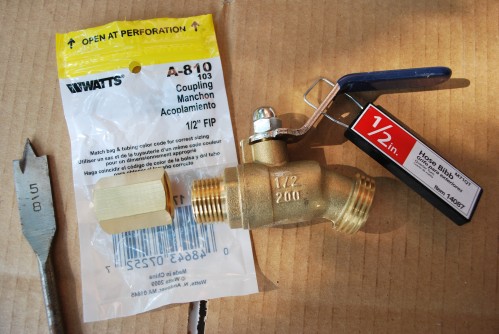
I had several left over plumbing parts, but if you don’t, no worries. I spent about $20.00 with most of the expense coming from a flexible gutter spout, wire mesh (because the barrel did not have a top), a quarter turn ½” spigot, ½” compression fitting and a PVC part for water overflow.
As with any DIY project, the most important thing to remember is safety first. Make sure your work area is clean and free of any hazards. And always, wear safety glasses!
Step 1) Clean the barrels.
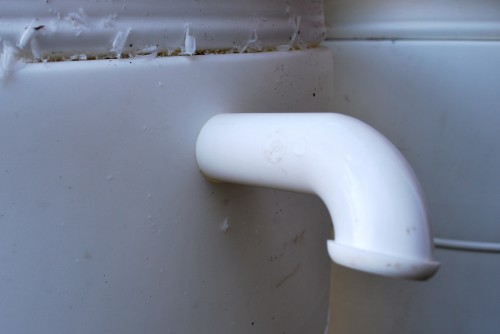
Step 2) Using a 1 ½” drill bit, slowly drill the hole for the water overflow spout. Because the barrel is plastic, you will be removing shavings of plastic. (The shavings can be hot, thus safety glasses are a must!) Insert the pipe and secure on the inside of with the twist on connector. Apply a bead of silicone around the pipe to hold it in place.
Step 3) Drill a 5/8” hole to accommodate the spigot. You may need to use a round file or a knife to enlarge the hole slightly so the facet will fit tightly as possible. Apply a bead of silicone around the spigot on both sides. I used a coupling on the inside to hold the facet in place.
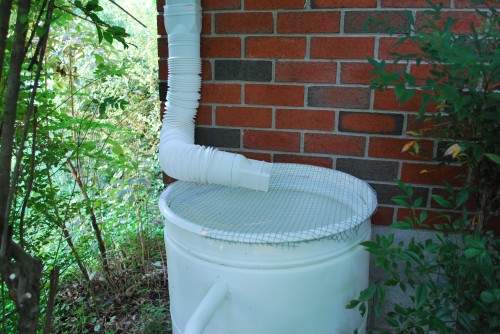
Step 4) The barrel I was using had a 21” round opening, I decided to use galvanized hardware cloth that had quarter inch openings. One thing to keep in mind, standing water attracts mosquitoes, so it’s important to have some kind of screen to keep them out. Also you’ll want to keep out leaves and other debris.
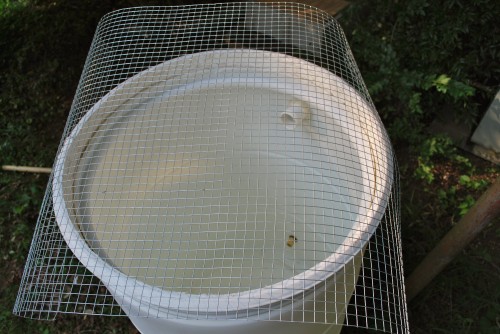
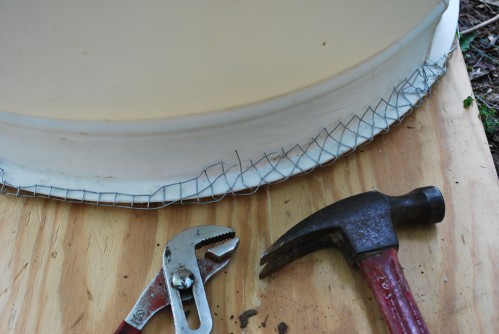
I cut out a flat square 24” across and using pliers, wire cutters and hammer, crimped the wire screen under the lip of the barrel.
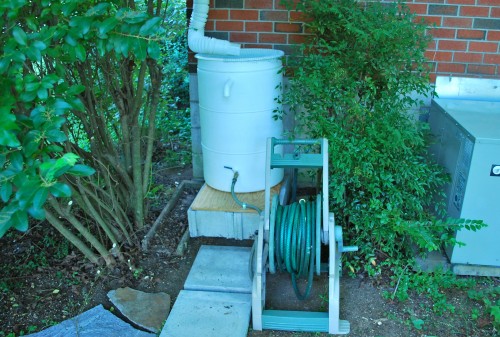
Step 5) Keep in mind that water flows downhill, so besides locating your barrel close to a water source, namely your gutter downspout, I placed my barrel on top of cinder blocks and scrap plywood. With a flat shovel, try to level the ground a bit with a forward pitch so that the water inside the barrel will flow toward the facet. With the elevation, I could put gravity to use while allowing ample clearance for the hose connection.
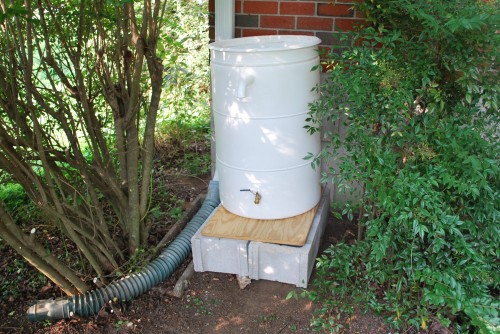
Step 6) Cut the downspout at the appropriate height with a hacksaw to allow for the flex spout to be attached. I secured the flex spout in place to the top of the barrel with wire looped through the open wire grid.
Step 7) Attach the hose to the facet. I used a clamp to hold the hose in place as to not place any stress on the connection while pulling on the hose.
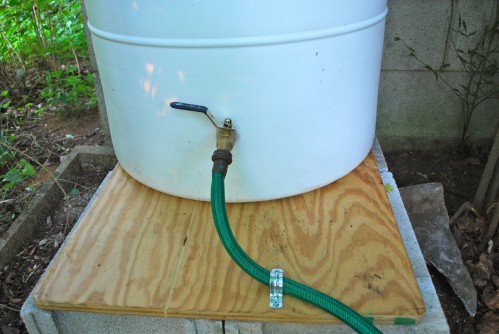
TIP: Use a rollup garden hose holder to keep hoses neat and in place.
Despite building my rainwater collector in 97 degree heat, I was extremely satisfied that the water flowed downhill easily to water my garden 15 yards away. The assembly was nowhere as difficult as I had expected. Already I am working on some modifications to the second barrel using a five gallon bucket with a removable top as a funnel.
There are all kinds of resources available to build your own rainwater collector in addition to commercially available collectors.
The instructables website has several step by step instructions.
While Y2K never happened, I just knew that one day (or 10 years later) these barrels would come in handy one day.
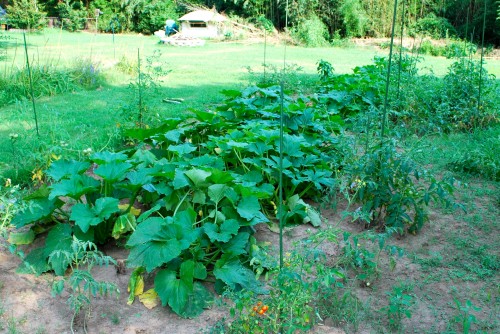
The greater joy is taking advantage of water from the heavens to feed the bounty of vegetables for my dinner table and hopefully saving some dollars off my monthly water bill. Let it rain!
