One of the first things you might want to do after getting your Ham Radio License is talk on the radio. However, there are many things you may have to do to get that done depending on what kind of radio you purchase.
If you purchase a handheld radio, you likely already have an antenna included in the box. These radios typically will have 2 m and 70 cm bands on them so the antenna is small enough that they usually include one right in the box. Even my Yaesu VX-7R included an antenna that works on the 6 m band as well.
These handheld radios which include these bands are usually the first radios most ham operators start off with. However, if you purchase a high frequency (HF) radio so you can talk to the world, then you likely don’t have an antenna since most HF antennas would be too large to fit in the box. You will either have to purchase one or build one, which for some could be daunting. But if you follow the instructions I have below, then you should be able to get on the air in short order.
Today I am going to explain how to “build” a simple antenna that requires no soldering skills. Building antennas is a skill that you should acquire as a ham operator. You can, of course, buy an antenna, but what if your current antenna was destroyed by a storm and all you had is your coaxial cable and some wire?
In a future post, I will discuss how to build a simple antenna out of wire, which is quite similar to the one we’re building today. For now, here is the parts list for what you will need to build a simple antenna for the 10 m band:
1. 2 Jetstream JTMHF10 10m Mobile HF Stick Antennas.
2. MFJ-347 Dipole Mount
3. A length of Coaxial Cable, preferably RG-8X or RG-213U to keep losses low.
4. SWR Meter
5. Optional: Build a Balun and buy or build an antenna tuner.
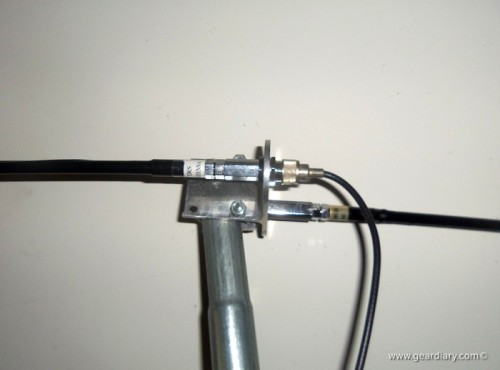
The first item on the list is a 10 m Mobile antenna, or more specifically 2 of them. These are made so you can put them on your car/truck and operate on that one band while you drive or ride (with riding being preferable for safety’s sake). In this case, we are going to use the MFJ mount to make a rather common antenna, a dipole antenna.
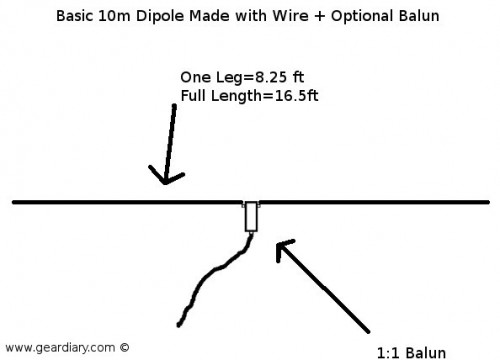
What is a dipole antenna? Traditionally, a dipole is an antenna that is usually made with 2 pieces of wire and a center insulator.
Now, you can’t just have any length of wire otherwise it will not work due to a high Standing Wave Ratio (referred to as SWR from here on out.). SWR is a ratio of the amount of power going out versus the amount of power being reflected back down your coax in a basic sense. The more power reflected back, the less you are transmitting via your antenna.
Ideally, you want a 1:1 ratio which means all of the power your radio is producing is being radiated by your antenna. So, to make a 10 m dipole with wire, you would need about 16.5 feet. This sets the center frequency to 28.4 MHz which is in the middle of the sideband portion of the 10m band. I will get more into sideband, or more correctly Single Side Band in a future post, but for the purpose of this post, this is the usual standard voice mode for HF or High Frequency radio. As for how I got the length of the antenna, the Kitchner-Waterloo Amateur Radio Club has a handy calculator on their website to help calculate the length of the antenna. This is a formula I will be using in another post as well. Today’s antenna will not require us to know this information, but to understand what a dipole is and how they function is crucial to knowing why this antenna will work.
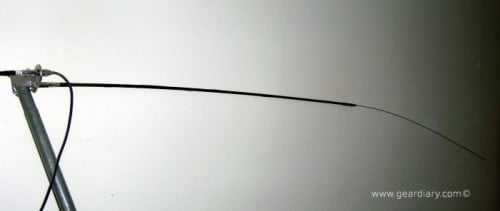
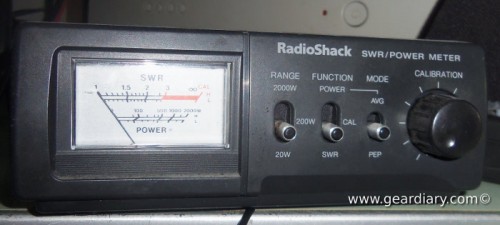
Construction of the antenna could not be easier. Once you have all of the components, you just screw the stick antennas into the MFJ-347 mount, extend the whips on the antenna such that each side is about the same length, connect the coax to the antenna side of the SWR meter and the transceiver side of the meter to the radio. Set your radio up in any mode that can provide a continuous signal.
Single sideband only transmits a signal when you are talking. FM mode will transmit a carrier even when you are not talking and CW or morse code will transmit a signal as long as you hold the key down. On my radio, I use FM since I do not have a CW mode or tuning mode built into my radio.
Key up the microphone and check the SWR. Typically you want 2:1 or better with 1:1 being the goal. Some radios include antenna tuners (more on this later) or built in SWR meters that you can use instead of an accessory meter.
Optionally, you can (and probably should) build a balun. A balun is shot for balanced/unbalanced. It essentially takes the unbalanced coaxial cable and converts it to a balanced output since a dipole is a balanced antenna. However, I have successfully used the above antenna with no balun. For more on this, check out this reference on antenna balance and this HamUniverse article on how to build an ugly balun.
Building a balun is easier than you think, and it should increase the performance of your station as well as make it a bit safer by reducing the amount of RF that is on the shield of the coax. I chose not to do this for the moment as my radio, a Radio Shack HTX-10 only produces 25 W.
When operating at QRP or low power level of 5W or less, you could also probably get away with not using a balun as well, but it’s one of those things that can only help your station and not hurt it. You can get away without it, but it’s probably something you should look at doing in the near future.
The second optional portion of this setup is a transmatch or antenna tuner. The tuner’s job is to match the 50 Ohm output of the transceiver to the unknown feed point impedance of the antenna system. In layman’s terms, this takes care of the SWR of your antenna system so that you can use an antenna on one or more bands. With this antenna, you could set one up with 80 m whips and setup an antenna tuner and use it on 80, 40, 20 and 10 m bands. This makes it much easier to operate on modern multiband transceivers like the Yaesu FT-817ND.
Antenna tuners can be manual or fully automatic depending on the radio or tuner you purchase. Some radios even include this in the radio chassis making it very convenient. This is something you don’t need if you are only operating one band (like I do, since my radio can only operate on this band), but it surely can’t hurt to have a better match. This match does not occur without some losses, but it will help protect your radio from a high SWR situation that can occur when you are building antennas and let you actually use an antenna system that may not be the best. For more on this, check out the wikipedia article I linked to above.
How does the above antenna work? Well, recently 10 m propagation itself has been fair to poor during the day and trending more towards the fair side. Propagation is a behavior of radio waves that give radio its range; the better the conditions, the farther your radio signal will go and the farther you will be able to hear.
With HF radio, good conditions are far more important than with high frequency bands like 2 m and 70 cm. With fair conditions on 10 m, I was able to use my little 10 m radio to talk to a K4AAK who is located in Marietta, GA. From Columbus, OH to Marietta, GA is about 549 miles away by car. I am hoping with improving conditions, I can probably get to talk to stations outside of the US.
To some, this may seem like a pointless exercise. When you can talk to the world by just typing into your computer or using Skype, being able to build, operate and maintain a HAM radio not seem like a big deal. However, keep in mind I can operate this station in pretty much any location and have it setup in minutes using either a battery or a generator. You simply cannot do that with the internet, especially when you are in a disaster situation like the aftermath of Hurricane Katrina in 2005.
Learning skills you need to get your Amateur Radio License and building antennas will help you help others when disaster strikes. I hope you find this informative and interesting, and if you want to know more about this fun hobby, let me know!
W3RAZ


