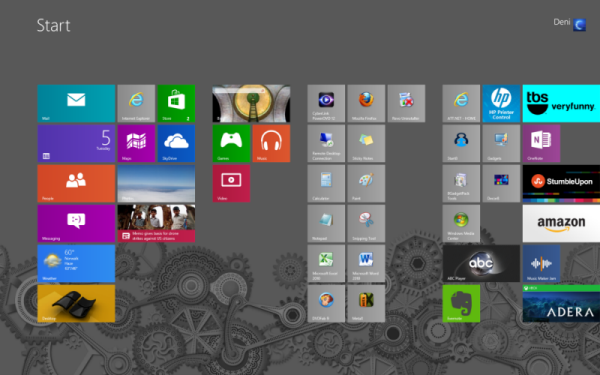
When Windows 8 was first coming out, I knew I wouldn’t like the Metro IU very much on a desktop computer and so I never even considered “upgrading” my desktop. A surprising set of circumstances brought me a Windows 8 tablet, and that was my first experience hands-on with the new OS.
I can say that on a tablet computer with very limited memory, that the Metro UI is actually fun, and is not entirely dissimilar to iOS or Android tablets. The added benefit of actually running a full version of Windows 8 in the desktop mode however, is amazing! This really was what I was waiting for in a tablet! It’s hardly perfect, but few things actually are. If you’d like to read why I got rid of my iPad and chose the ATIV Tablet instead, click here. However, I decided that if I was going to write here on Gear Diary about Windows 8, that it would serve me well to be able to compare things on a powerful desktop computer as well as on an Atom processor tablet to see how things stack up.
Now I use Windows 7 every day on my desktop and laptop, so there was no way I was going to give up my primary hard drive on my desktop computer to be able to do this experiment, so I needed to prepare a new (repurposed actually) hard drive to install the OS on. Since I had had a major hard drive crash on my primary Win7 OS drive, I thought I would just restore from one of my backups and scoot along, but there was one error in the file that really bugged me, as well as causing some challenges. For reasons that I could not figure out, (Nor could my friend Google!) all of my hard drives and my blue-ray drive were showing up in My Computer as flash based drives, which prevented them from any kind of auto-playing. Now, this isn’t a huge error, and I could still access everything, but since I didn’t know what was causing it, I decided that I wanted a 100% clean installation of Windows 7 before I upgraded to Windows 8. I didn’t want errors following me into the next OS. Before I erased everything by formatting the drive, I ran the Windows 8 Upgrade Assistant to tell me what software I had running that wasn’t going to be compatible. I had several programs that were going to need to be updated, but fortunately I was able to get upgrade versions on several at no cost, and lower cost on others.
So, I backed up all of my data, and then installed Windows 7 Ultimate. I was pleasantly surprised that I only needed to install a few drivers before being up and running! So I then installed and activated my compatible software. Once that was done, I made myself a new backup to use that did not have any of the previous errors in it. Then, I cloned the new Win7 drive onto the drive I was going to “upgrade” to Windows 8. I played around a bit with the software on the cloned drive and found there were a couple of programs that didn’t like having been cloned – it deleted or altered their registration tokens or something like that so that the program wouldn’t work. I also ran into trouble with Cyberlink and their crazy definition of what constitutes an “upgrade.” (If you are thinking of purchasing ANYTHING in an upgrade form from Cyberlink, I would strongly caution you against it. Pay the difference and buy what they consider a “full” version!)
So rather than work from the cloned version, I went back to my backup and used Acronis True Image 2013 to restore the drive from the backup I had just made. That brought me no errors with the registration. I was surprised that there was a difference between cloning and a restore from backup, but it was a good thing to know for the future! Then, it was time to take the big plunge and install Windows 8! Using the downloadable upgrade software (vs. installing from a retail DVD) you get an option to create a USB Drive, create an .ISO file to burn to a DVD, or to run the upgrade from your desktop. I opted to do all of them, just to see how the different processes worked. Building the USB drive and the .ISO image each took about 5-10 minutes to complete. I was then able to burn the .ISO image to a DVD with no problems and tested that the DVD would run the upgrade. Ultimately, I used the desktop software to complete the installation.
The process is a typical Windows installation. You enter your software key near the beginning of the process, and then you just let it do its thing. It took about an hour more or less to get to the point where I was answering the basic set-up questions. After the initial set-up was complete, you are dropped right into the Metro UI. My very first order of business was to install Start8, so that I could get my Start Menu back in the desktop mode! I installed a couple other Windows 8 Only apps (Decor8 & 8Gadget Pack) and then opened several of my installed programs to make sure that they were working. Everything seemed to have gone smoothly!
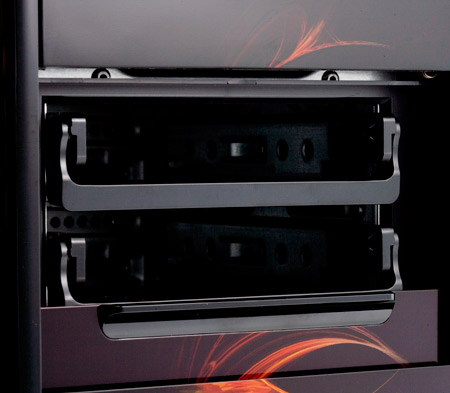
My desktop computer has 4 HDD bays in it, 2 internal and 2 swappable bays. I put my Win7 OS drive and the drive I use for my iTunes library into the internal bays, and the Win8 OS drive into one of the swappable bays. When I need to boot into it, all I need to do is hit F10 while booting and change the boot order to choose my Win8 OS drive. Then, I was finally able to close up my computer, which had been running for several days uncovered while I switched drives around.
Then, I powered down the Win8 drive and went back to my Win7 drive. About a week later I tried booting into my Win8 drive again. It booted up with no problems, but when I went into the store to see if the apps I bought on my tablet would show up now on my desktop, I got repeated errors and nothing would download. While researching that problem, I remembered that I had forgotten to use the free update code for Windows Media Center, so I want to the Add Features to Windows screen and entered the code for the Media Center.
And that’s where everything went to hell in a handcart! Right after I entered the code, I got a BSOD. (Blue Screen of Death) Crap! So I attempted to reboot, but no joy. Twice in a row it crashed while attempting to boot up. The third attempt to boot took me to the Auto Repair screen, where I had the option to try to erase my settings or repair the installation. So, I tried repairing, which took about 10 minutes then said it needed to restart. No problem, so I restarted and it started running the disc checker. Ugh! 30 minutes later, no drive errors were reported, but it still wouldn’t boot! So then I tried the “fix startup problems” option, and it told me that it could not fix the problem and to reboot again, but this time I heard a terrible “dong” noise followed by the error “Critical Process Died” and a log file location. Uh Oh…
So, I booted back into my Win7 drive and started researching the Critical Process Died error and found out that I was pretty hosed. This error had come up for other people as well; even those with OEM installed versions of Win8 with no commonality I could find, other than running Windows 8, as to the cause. But no one had been able to recover their hard drive after that error, the ONLY solution is to reinstall Windows 8 entirely and start over. (Insert many 4 letter blue words here!)
It took me about a week before I wanted to even try again, but try again I did. To prepare the drive this time, I did a manual full disc check & error fixing, which took about 3 hours. Then I did a quick format on the drive, and followed that with a long format, which again took about 3 hours. Then I checked the drive for fragmentation, and it showed none, and no disk errors. So, it was safe to install again. I recovered the drive from my clean installation backup and followed the exact same steps (except re-creating the USB Drive & .ISO – I didn’t need those again) and installed Windows 8.
During the set-up, I changed one setting. I had previously set it to NOT turn on location awareness. I didn’t think that was necessary for a stationary computer, but I had read that some of the store errors were being caused by this setting, so this time I allowed location awareness. The rest of the set-up went smoothly. The first installation again was Start8, but then I went into the Store to see if I still got the error, which I did not. I was able to find all of my apps and install them with no problems. I also tested my other software and then did a backup of the new Win8 system, just in case! After the backup was done, I took a deep breath and then went to install the Media Center code again. This time, it went off without a hitch, and had no troubles at all. Whew!!!
I’ve kept this OS drive up and running for about 3 days now. I’ve gotten a couple of runtime errors relating to TuneUp Utilities, and Windows Explorer crashed once, but was able to restart itself without rebooting. The only other issue that came up was that I had already used the activation code for Windows 8 on the drive that crashed, and apparently you only get one shot at it with an OS. I had to call in, and read a robot a long series of numbers and explain that the OS was not actually installed anywhere else, and then enter a long string of numbers, after which I was able to get the OS activated properly. Slightly annoying, but I can understand that they don’t want people to install multiple copies of the OS, when it is a single computer license.
SUMMARY: Good preparation by running the Windows Upgrade Assistant will let you know if you need to update software or drivers to be Windows 8 compatible. You’ll be happier if spend that time in advance. Spending a few minutes defragmenting your hard drive, checking your disc for errors, and removing programs that you no longer need before you start the actual upgrade will give you the best possible results. Then, take the time to make yourself a backup of your drive before you start to upgrade, so you have a designated backup to recover from, just in case something goes wrong. Even with what appears to be a good result with your upgrade, the first thing you should do is to make yourself a backup of your new system state post upgrade.
Stay tuned for the next installment: Hands On With Windows 8


