I think every family must have a hobby which all (or at least most) members of the family enjoy. Such common interests are what tie them together (and gives you something to talk about at family picnics). For my family, growing up, that common interest was photography. We all played around with both video and still photos, but the true love was probably still photos. Back then, we used to devise intricate plans for turning the basement into a darkroom (we never did).
Of course, that love of photography has carried me into the digital world, where I am happy to have a very nice digital darkroom on my laptop. I have all of the tools I need, and the smell is much nicer than all of those chemicals you used to require.
Sadly, I have not been able to get a fancy DSLR camera, like the one my brother has, but then again, when you are shooting fast-moving children who do not understand the meaning of the words, “sit still,” a point and shoot camera is probably best. As such, I was extremely intrigued when I read an advertisement for the new line of Nikon Coolpix cameras. My first digital camera, which my Dad gave me when my oldest son was born, was a 2 megapixel Nikon Coolpix. I have had other cameras since then, but I have to admit that I was extremely excited to attempts a return to the Coolpix line. Thankfully, Nikon agreed to loan me the Nikon Coolpix S600, their newly released ten megapixel point and shoot camera with an advertised, fastest power up time of any camera in its class. A bold statement, which we will be putting to the test, along with all of the features of the new Coolpix from Nikon. Hit the jump and, please, keep your arms and legs inside the review at all times.
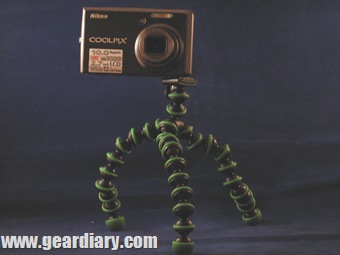
Overview
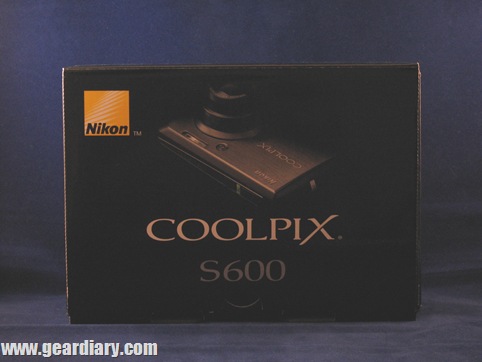
Before we take a closer look at the Coolpix S600 features, let’s just take the traditional Gear Diary quick tour of the camera and accessories. And there are quite a few accessories crammed into this box. In addition to the camera, you will find: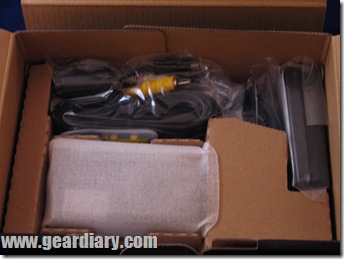
— Rechargeable lithium ion battery
— Battery charger with power cord
— Wrist Strap
— Audio/Video cable
— USB cable
— Assorted manuals and documentation
— Software suite
Note that although a memory card is not included (it uses standard SD cards), there is some internal memory which can be used to store photos if you do not have a memory card available.
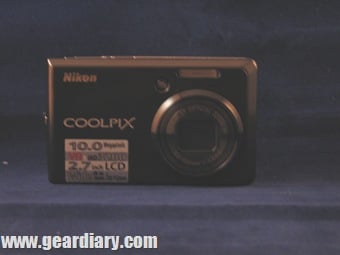
OK. Now that we know what we have, let’s take a closer look around. On the face of the camera, you can see the infra red eye. This light serves two purposes. First, it serves as the self timer lamp. When you use the timer mode, this light will blink to let you know when the picture is coming. This light will also serve as the autofocus illuminator, to assist the autofocus in low light situations.
Beside this light is the flash, which has multiple settings, including: auto, redeye fix, on, off, and night flash.
The main attraction on the face of the camera, however, is the Nikkor lens. It works great, and includes a 4x Optical Zoom so you can frame your picture exactly how you need to (as an aside, the Coolpix will also allow you to use a digital zoom, but most photographers do not utilize this option because of the negative effect it can have on photographs.) Although this 4x zoom is better than the 3x optical zoom, which seems to be about standard, I have seen point and shoot lenses with up to a 5x optical zoom. Let’s be honest, 4x is good, but 5x would have been even better.
 The top of the camera contains pretty much all of the expected controls. Here, you will find a microphone and speaker, power button and the shutter release button (the green lamp next to the shutter release indicates that the camera is turned on). One note about the power button, Nikon advertises this camera as having the fastest power on time of any camera, and they were not kidding. From fully powered down, I was ready to shoot in less than one second. That was about as close to instantaneous as you can get, especially when compared to other cameras, which typically take 4-5 seconds to power up.
The right side (as you are holding the camera) contains the AV and USB connections, which are hidden [This picture compliments of Nikon]
by a small plastic door. I never like these small plastic doors, because the hinge always feels so flimsy to me, and this was really no exception. I wish they would use a sliding panel instead of this door, as that would be considerably more sturdy. Beneath that is the wrist strap eyelet. Just tie the end of the wrist strap through the eyelet and you will be ready to go. I was disappointed to find that the wrist strap does not have a slider on it to tighten and loosen the strap. With three kids who are very fond of grabbing things out of my hand (especially electronics), it is nice to have the wrist strap more securely fastened to my wrist.
There are no controls on the left side of the camera. However, while we are looking at the side of the camera, I did want to mention the depth of the body here. At just .9 inches, it is the skinniest camera I have ever used. How they managed to squeeze 10 megapixels into this tiny body is beyond me.
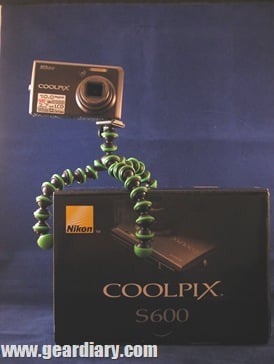
The bottom contains a standard sized tripod jack, so I was able to mount this camera on any tripod. Additionally, there is a door which contain the battery and memory card slot. Just slide the button on the door and you can access the battery and memory card. Again, I was extremely surprised by the size of the battery. Here it is compared to the battery from my other camera. It is smaller in every dimension, and is even roughly 1/3 the thickness. Yet, it still manages to snap nearly 200 pictures per charge. Extremely impressive. I also liked the fact that the button securely locks the battery panel shut. With other cameras, I have had problems with this panel popping open at inopportune times. I never had such a problem with the Nikon Coolpix.
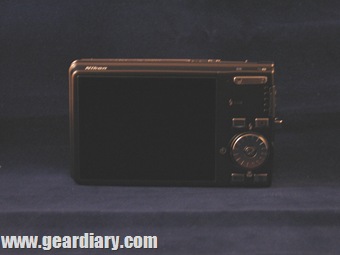
Of course, the back of the camera is where you will spend most of your time. Here we have the zoom buttons, a flash status indicator, and four buttons around a D-pad/scroll wheel. These buttons control your access to the menus and functions of the camera. I did find that these buttons could have been better organized. As I will discuss later, there were often times that I could not recall which button lead to a particular menu, feature, or option. Then again, many of these options are really overkill. We all know that at least 95% of the people using this camera will plunk all of the settings on auto and let the camera take over. But, for those of you who want some more control over your settings, this is where you will find it. The rest of the back of the camera is taken up by the massive 2.7 inch LCD screen. I really liked this screen, which is the perfect size for viewing photos.
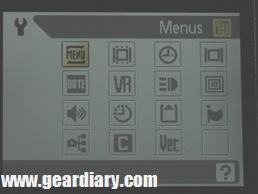
Before we get into taking pictures, you will want to setup the camera. Of course, there is the obligatory charging of the battery. Once the battery is charged, and you have inserted some additional memory, hit the Mode button, and then scroll over to the setup menu (that would be the wrench.) From here, you can control all of the basic settings on the camera, including:
— Whether menus are displayed with words or icons
— Whether there is a welcome screen (I do not recommend it as it slows the startup time considerably.)
— Date and Time display settings
— Automatic assist settings, such as vibration reduction and autofocus.
There are plenty more decisions to be made in this menu, but I think you get the point. Let’s move on and take some pictures.
Pictures 101
Basic Operation: All right, let’s start with the basics. This is a point and shoot camera, and that is exactly all you need to do. Just aim the lens and hit the shoot button on top. Bam! Instant digital pictures. Once it is setup, this is an extremely easy camera to handle. Now, to complicate things a bit, you can zoom in and out using the zoom buttons, again, nothing out of the ordinary or expected so far. At this point, the Nikon Coolpix is exactly on par with every other digital camera you have ever used. I mean, they all operate pretty much the same. Zoom and shoot.
In addition to this ease of use, it will even snap these photos in up to a whopping 10 megapixels. I have to admit, I have some real mixed emotions about this feature. On one hand…that is TEN MEGPIXELS!! I mean, WOW! On the other hand, sometimes 10 megapixels just means larger pictures, which take up a lot of space on a memory card. I mean, do you really need larger than life sized pictures of your new cat? The truth is that if you are viewing or printing standard 4×6 or 5×7 pictures, then a 5-6 megapixel camera will do just fine. However, if you plan to significantly crop and zoom any of your images, or print much larger pictures, then you will really appreciate the clarity that 10 megapixels can bring. In the end, I snapped most of my pictures using the highest resolution available (10 megapixels) and found that taking pictures at this resolution certainly did not hurt anything. I was impressed by how many pictures (well over 250) I could fit on a single SD card.

Then again, whether your pictures will be crisp and clear depends on much more than just the megapixels. All that really tells you is how large the pictures will be. Whether a digital picture is crisp and ready to be cropped and zoomed depends mainly upon the processor within the camera. In this case, I found the processor to be simply not adequate. The result was a whopping 10 megapixel grainy picture. With so many other fantastic features, I was really disappointed by the graininess and lack of crisp lines in these pictures.


As an example, I took two pictures of my son, and then cropped and zoomed on his left eye. Can you guess which one was taken with the ten megapixel camera? Yup, the blurry one on the left. The one on the right was taken with my 5 megapixel camera. If Nikon had put a better processor in these cameras, then this graininess would likely not have been a problem. In that case, Nikon would have had a real winner on their hands.
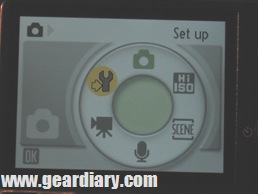
Modes: There are three different still picture modes available on the Nikon Coolpix S600. The first Mode is Shooting Mode, or what I typically refer to as automatic. This is the mode that 95-99% of users are likely to stick with. Here, the camera will determine the best settings for each situation. This is where you can literally point and shoot. Let the camera do all of the heavy lifting for you.
The second mode is the High Sensitivity Shooting Mode. This mode allows you to reduce blurring when shooting in low light situations. While I felt that this was an important option to have available, I did not really think it warranted an entirely new shooting mode. I also did not really understand why this was in Modes, while Macros was under the Quick Menus. This is another example of the poorly organized menus. Although Macro and High Sensitivity could be considered parallel options, one is under the Modes menu and the other is a Quick Menu. Again, I really had a hard time understanding the menu layouts, and figuring out the logic behind where each option was placed.
The final Mode is Scene Mode. Any user of a digital camera is sure to recognize these options. Essentially, Scene Mode is a actually a group of shooting modes, in which each mode optimizes the settings and options for the particular subject or scenario. There are 14 different scene modes on the Coolpix S600, and I do not plan to name them all. In addition to the standard modes, however, there were a few which I felt were unique, including: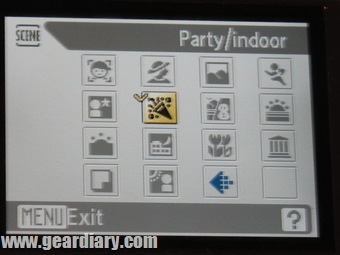
— Museum
— Sunset
— Beach/snow
— Close up
Again, however, I was a bit perplexed by the menu layout. If users are likely to access any options, it is the ones found in this menu. Yet, rather than make it immediately accessible, it is buried two levels deep in the Mode menu. I would have placed this in the Quick Menu, so that you could quickly and easily access these settings while shooting, as conditions changed.
Menus: Aside from actually taking the pictures, the most important part of any digital camera may be your access to the various options. Being able to quickly change the settings to match your conditions can mean the difference between a well composed photograph, and the frequent use of the delete button.
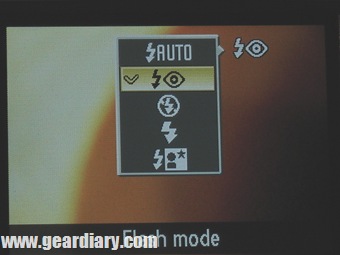
There are four quick menus, which represent four menus that you may frequently change midstream while taking photographs. These four menus can be access by pushing the D-Pad control:
— Up for flash mode
— Down for Macro
— Left for auto timer
— Right for Exposure control.
In each case, a popup menu will appear on the screen, allowing you to set the appropriate item. I really liked these instant menus and the on-screen popup menus, however, I felt these menus may not have all been the best choices for the instant menu buttons. These should be the options which you would want to change on the fly, while shooting pictures. Rarely do you need that kind of instant access to the self 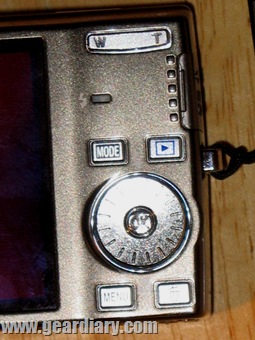 timer. This could just as easily have been left in another menu. Likewise, I am not sure that exposure control required this kind of access either. Certainly, this is an important setting, however, most users of the Nikon Coolpix S600 are more likely to leave this setting on automatic, making this menu superfluous. Instead, I would have liked instant access to the scene selection menu and the ISO menu. These popups would likely have been considerably more useful to me, though other users may have different ideas. As such, it would have been best if you could customize these menus to allow quick access to the settings you use most often.
All of the other features which can be changed are under the menu button. There are a number of features and options, most of which you would expect to find on any camera. One nice thing is that these menus change depending on which mode you are using, so that only the applicable options are displayed.
I really liked all of the options which were presented here, even though I will probably never use many of them. I did feel, however, that the menus could have been organized a little better. Between the Quick Menus, Menu Button, Modes, and Setup Menu, I frequently lost track of where an option or feature could be found. While I really appreciated all of the control that the menus offered, I did not feel they were intuitive or well arranged. As such, I would offer the following suggestions:
— Give Settings its own button, rather than making it part of the Modes menu.
— Move the High Sensitivity, Macro, Exposure Control, and Auto Times into the Menu Button
— Leave only Shooting, Audio, and Video under Modes
— Scenes should be included as a quick menu button with a popup menu
— The other two quick menu buttons should be customizable. As such, you could determine which options were important to you to have at the ready, and program them to the Quick menu buttons using the Settings Menu.
The result of these changes would have been a much more concise menu structure, and more intuitive controls.
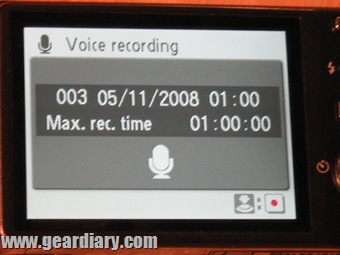
Audio: I found the audio recording feature to be extremely unique, and was intrigued to test it out. There are two ways to access it. First, you can select the microphone from the Modes Menu. Doing so will allow you to record any audio you wish in clips up to an hour in length. While this can be handy for recording narration to go along with a slide show, it mostly felt like a gimmick to me.
The second way to record audio, however, felt much more useful to me. While reviewing your photos, you can record a 20 second clip on each photo. This is a fantastic way to attach a brief audio note to the image while you still remember what was happening in the picture. The next time you playback the picture, the audio note will play with it automatically.
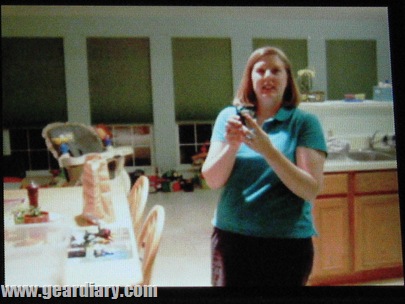
Video: Like most digital cameras these days, the Nikon Coolpix S600 can record video, as well as still pictures. I have always found that still cameras record mediocre video and video cameras record mediocre stills. Nonetheless, it can be handy, at times, to have both on one camera, and I certainly understand the reasons for including such a feature. All of that being said, I felt the video recording feature was passable, but not good enough to trust your family memories. But it was certainly good enough to grab some video in a pinch.
Playback
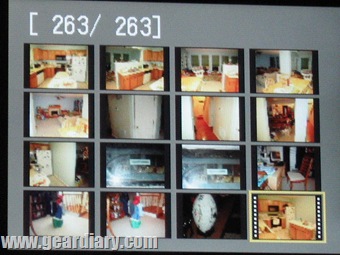 Once you have taken pictures or video, of course, you will want to see how it came out. And if your kids are anything like mine, they will want to see it RIGHT NOW! Just tap the playback button and you are ready to go. You can use the scrollwheel to view all of the pictures, or select slide show from the options and just let it go. You can also use the zoom buttons to zoom in and out of the pictures as you view them. Of course, you are not always going to want to view the pictures on your camera. For many reasons, you will want to enjoy them on your 50 inch television or transfer them to your computer. Both are simple to do. Just use the included cables to connect the camera to your television or computer. Piece of cake. And, everything you need is right there in the box. Heck, as we will look at in a minute, even the software you need to transfer the images to your computer is already included.
Other Features:
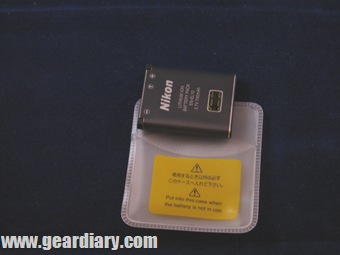
Battery: I was extremely impressed that this tiny, skinny battery worked as well as it did. On a single charge, I got just about as much power as my other camera, however, that camera’s battery is three times as thick.
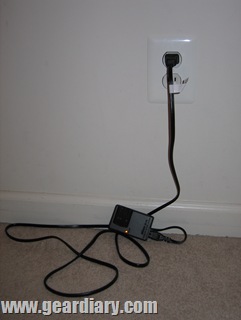
I was not as impressed, however, by the charger. Many cameras have a one-piece charger, meaning that the charger has the AC adaptor built into the back. This is ideal as it makes for an extremely compact unit when traveling. The Nikon, however, utilizes a two piece charger. There is the charging unit, but there is also a charging cable which connects the charger to your AC outlet. There is nothing worse than an ultra-portable device with a bulky charger, and that is exactly what you get here. Nikon did a great job designing an extremely slim battery, but ruined that effect with a bulky, two-piece charger.
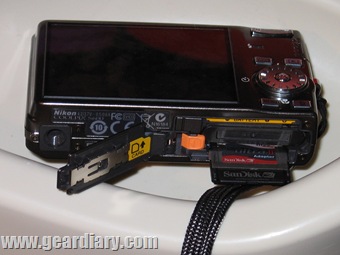
Memory: There are two places to store your pictures on this camera. First, you can use the 45 MB of internal storage. This should allow you to store about 10 pictures at the highest quality (over 300 at the lowest).
Additionally, you can insert any SD card into the memory slot (next to the battery.) At the highest image quality, I was able to store well in excess of 250 pictures on my 1 GB memory card.
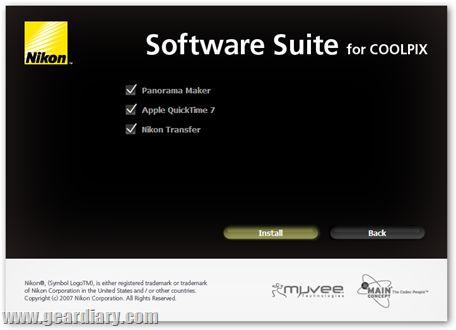
Included Software: I was a little disappointed by the lackluster software package that came with the Nikon. Typically, there will be at least a minimal editing package and maybe even a few free trials of more hefty programs. Not so with the Nikon. The disc contained only three programs: Apple Quicktime, Arcsoft Panorama Maker, ad Nikon Transfer.
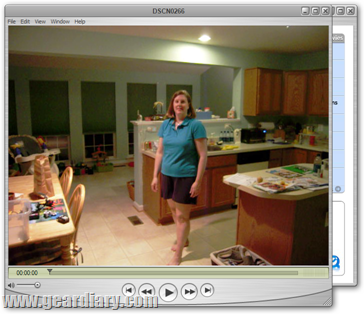
The Apple Quicktime video player should require no introduction. This is Apple’s video player. When you run it for the first time, if you do not have the latest version, you will be prompted to upgrade. Go ahead and download the upgrade and we’ll take a closer when you are finished. Essentially, however, this is a standard video player. While I thought it was nice that Nikon included it, the videos you record are stored in the AVI format, which will play on almost any media player, so it was not entirely necessary. Additionally, the Apple Quicktime player is available as a free download, so its inclusion really offers little added value.
Next was the Panorama Maker, which is a nice little utility, if not the easiest thing to use. You really have to be careful to maintain perspective when you are shooting your pictures or your nice panorama will end up looking more like an M.C. Escher painting.
Once you are in the program, you will need to remember exactly where your photos are stored in order to access them. It would be nice if you could just drag and drop them into the workspace. Once your photos are loaded, just ensure that they are placed in the correct order and hit the stitch button.
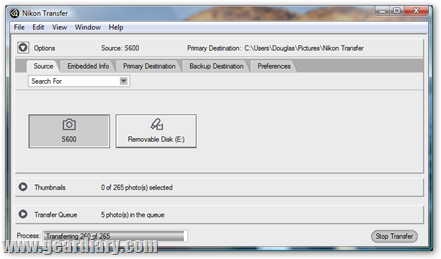
The Nikon Transfer utility is an easy way to retrieve the pictures from your camera. Advanced users probably have another program they like to use, such as Microsoft Digital Image Suite, Adobe Photoshop, and others.
To transfer your pictures, just connect the camera to your computer and select start transfer. This one touch transfer is fantastic for a novice (are you reading this, Mom?) who might have problems figuring out how to copy and store their photos. Once downloaded, the pictures can be viewed using any photo viewer on your computer (if you do not have one, then Quicktime also does include a photo viewer). I really did not understand why the transfer utility did not include even a rudimentary photo viewer or library.
I was really fairly disappointed by the software included with the Nikon Coolpix. Quicktime is both already a free download, and fairly redundant of software which came with your device. Nikon Transfer does exactly what the name implies. It transfers your pictures. No more, and no less. The Arcsoft Panorama Maker was the lone gem of the package. It was relatively easy to use, and really made a nice finished product. Still, this hardly made up for the lack of a real photo viewer of editor in the package.
Conclusion
I was extremely impressed by the size and design of this camera. When they say that it has the fastest startup time of any camera, they really mean it. Unfortunately, however, as with many of these ultra-slim cameras, I found the picture quality was merely mediocre. It worked well enough to take pictures to email to grandparents or display in a digital frame. But if you have designs to blow up your pictures, or crop and zoom then the picture quality really deteriorated fairly quickly. I may have missed a setting somewhere which would have improved this, but if I missed a setting after spending several weeks intensely poring over the camera and manual, then it is a good bet the average user will also miss the same setting. Nonetheless, if you are just looking for something which you can toss in your pocket and take to Little League or soccer games, then this is an extremely nice option.
What I Liked: The tiny body makes it extremely portable. Great lens. Nice feature set. Easy to access and use. Start up time was instantaneous. 10 Megapixels.
What Needs Improvement: Inadequate image processor resulted in grainy pictures. Menus were a bit disorganized. 5x Optical Zoom would have been nice. Package should have included a small memory card and some editing software.
Where To Buy: Nikon and many other camera retailers
Price: $299.99

I would really love to see a picture comparison between 5 Megapixel photo taken from 10 Megapixel camera and 5MP photo taken from 5 MP camera. That would make an interesting comparison, because if it can take a near-perfect 5 MP photo then why not use as a 5MP camera with extended capabilities 😀 ?
MaGNuM. That would have been a good idea, and I tried to do this after I saw your comment. Unfortunately, I already boxed up the camera to send it back (my time with it actually ends today) and I did not use it in 5 MP mode very often.
But the pictures I used in this post were all 10 MP pictures. That means, those will be the best quality pictures you will get.
Doug