Not being the type that can leave well enough alone, I installed Windows 7 to my Wind as planned on 1/18/09. Windows 7 is interesting. I’m still exploring… However, after I installed 7, I really wanted to see if I could put OSX back on. Having the dual boot is really cool; and the dual boot with Windows 7..? Oh yeah. I’d be the king of my local Geekdom. I had to try…
The following is not sanctioned by Gear Diary, and is an advanced piece of hackery. However, once you master dual booting XP and OSX, I found this to be a bit easier. The only hard part, per se, is repairing the boot loader, and honestly, with the tool I found, its very easy. Anyone with a Wind can do this…
Please note that you CANNOT upgrade your XP installation to Windows 7. Win 7 will make you blow the install/drive and start from scratch, or install to an empty partition. That being the case, the process for this is a bit more straight forward. You will need most of the tools and apps from my previous article, and you’ll need one new tool: EasyBCD.
As I said, this process is pretty easy, and straight forward. You should also note that I got the inspiration for this post from a thread at Forums.MSIWind.net.
1. Partition the Drive
Boot from the Wind compatible OSX USB stick or DVD that you created to install OSX and partition the drive with Disk Utility. Insure that the Windows partition is first, and is formatted as FAT32. After that, if you want to have a data partition or simply use the rest of the drive for OSX, that’s up to; but that should be formatted as FAT32 as well so both Windows 7 and OSX can read and write files to and from it. The OSX drive should, again, be formatted as HSF+ (Journaled).
The point is that you can partition the drive any way you want, as long as the drive is partitioned with MBR and the FAT32 Win7 partition is at the top of the drive map.
2. Install OSX
When the drive is partitioned the way you want, quit Disk Utility and install OSX. When that’s done, boot into OSX to insure that everything is good to go.
3. Install Windows 7
I’m not certain if there are still beta licenses of Windows 7 available. If there are, you’ll need to get one, to obviously install Windows 7. If you have access to another legal copy, you should get it that way. When you get to the point where Windows 7 wants you to pick a drive to install Windows 7 to, the install routine will tell you that you can’t install Win7 to any of the drives you’ve got. Pick the intended drive for Win7 and reformat it as NTFS. You’ll then be able to move forward with the install.
Make sure that you run Windows Update twice. The first time, you’ll download drivers for the 802.11b/g/n, as well as updates for Windows Defender and a Win7 Beta Client update. The second time, you’ll download drivers for the wired LAN card and the USB Card Reader.
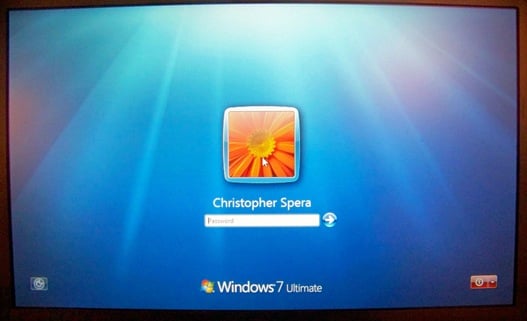
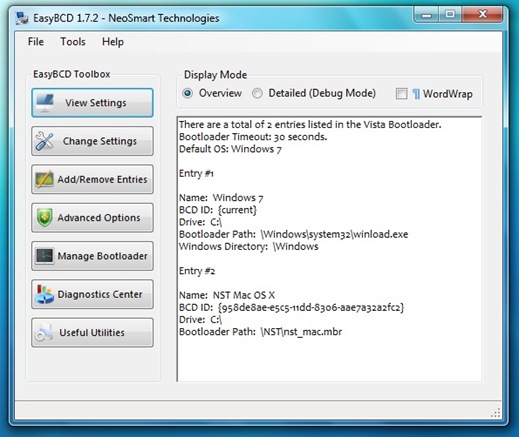
Restart the PC as necessary. The computer will boot into Win 7. Please note that you will NOT see OSX at this point. Don’t worry. The install is still there.
4. Set the Windows 7 Partition as the Active Partition
When you finish, boot from win7 DVD and select repair. Select CMD (last choice) when the Command Prompt opens, type the following commands:
Diskpart
DISKPART> list disk
DISKPART> select disk 0
DISKPART> list partition
DISKPART> select partition 1
DISKPART> active
exit
exit
Now, off the main menu, select repair (first choice). Once you’re done, reboot. You’ll be taken back into Windows 7 again.
5. Download and install EasyBCD
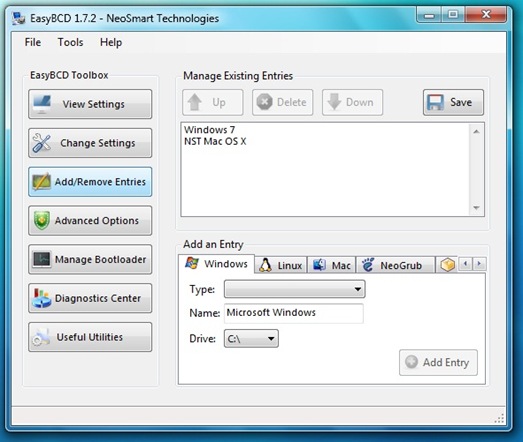
EasyBCD is a bootloader, like the Darwin Bootloader that comes with the Wind compatible OSX install. However, unlike GRUB, Darwin, or even the bootloader that comes with Windows 7, its got a GUI interface; and its very easy to use.
After EasyBCD is installed, follow these steps. Please make certain you are logged in with Administrator privilages:
Click the Add Remove Entries button
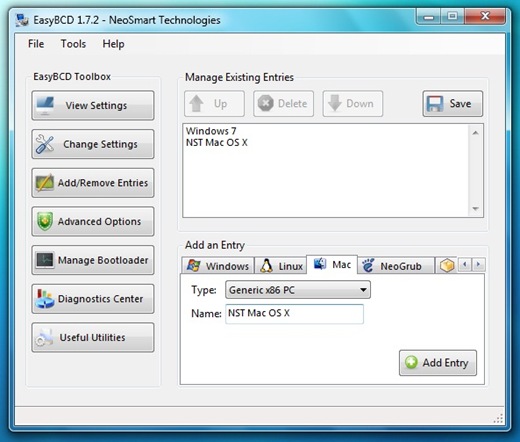
In the Add an Entry area, click the Mac tab.
Click the Type Tab. Select Generic X86 PC
In the Name dropdown, use the name NST Mac OS X
Click the Save button in the upper right corner
6. Restart the Computer
When you restart the computer, you will see a boot loader screen. Hit the down arrow to choose the OSX entry you just created. Hit the enter key. You’re going to be taken to the Darwin Bootloader. Hit any key to stop the counter, and scroll to the OSX install, and the computer should boot to OSX.
That’s it… The only problem that I have found (if its actually a problem) is that there are two boot loaders on the Wind right now. However, I can boot to either OS at my leisure. I’ve already updated OSX to 10.5.6 and reinstalled the KVM drivers. The whole process was done in under 2 hours, and that included installs of both operating systems and updates to both.
If anyone has an easy process for installing Grub instead (or another bootloader), OR knows how to fix the dual bootloader problem I’ve created for myself, I would really love to hear from you. While this isn’t a huge problem, its kinda gimpy, and not ideal for the local Geekdom…

thank you now i have best of two worlds!
Most of this worked, but EasyBCD 1.7 would not allow booting to the Mac. I had to run EasyBCD 2.0 (beta) and add the Mac entry as MBR. Then it worked perfectly.
QUICK question, by the way I wanted to thank you for all your great help. I hsd one more question, I needed to install windows 7 beta, but now have the original window 7 full real version that I want to add. Can I upgrade without having to do the steps all over again? Can I use the onscreen upgrade features?
You can always try it. The alternative is to blow the drive and rebuild. If things go south, you’re going to have to rebuild anyway. However, you should understand that MS normally doesn’t support an update from beta to retail version. If you had the beta on the PC, you’re going to need to blow it and reinstall that partition from scratch.
Good luck; and let me know how things go for you!
@PiPS_tweet http://bit.ly/csyrra ?7??? chain0? ? ????? ???, ?? ??? ???.
@enricop then use EasyBCD to create multi-boot screen as seen here -> http://bit.ly/csyrra then voila u in biz.
Dual Booting the Wind – OSX and Windows 7 | Gear Diary http://bit.ly/egf50Y